 Sign in to Mod The Sims
- Site Map >
- Modding and Creation >
- Sims 3 Creation >
- CAS Parts >
- Gabled Hood- UV problem, fixed?
- Site Map >
- Modding and Creation >
- Sims 3 Creation >
- CAS Parts >
- Gabled Hood- UV problem, fixed?
 13th May 2010 at 2:06 PM
Last edited by Ahlaam21 : 14th May 2010 at 3:24 PM.
13th May 2010 at 2:06 PM
Last edited by Ahlaam21 : 14th May 2010 at 3:24 PM.
Posts: 91
Thanks: 179 in 1 Posts
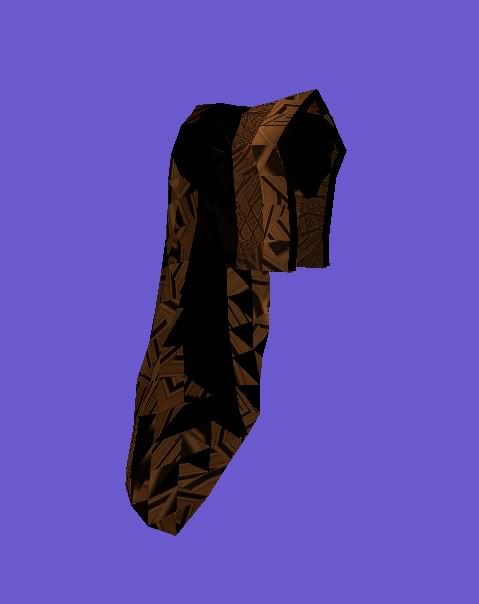
This is done in CTU:
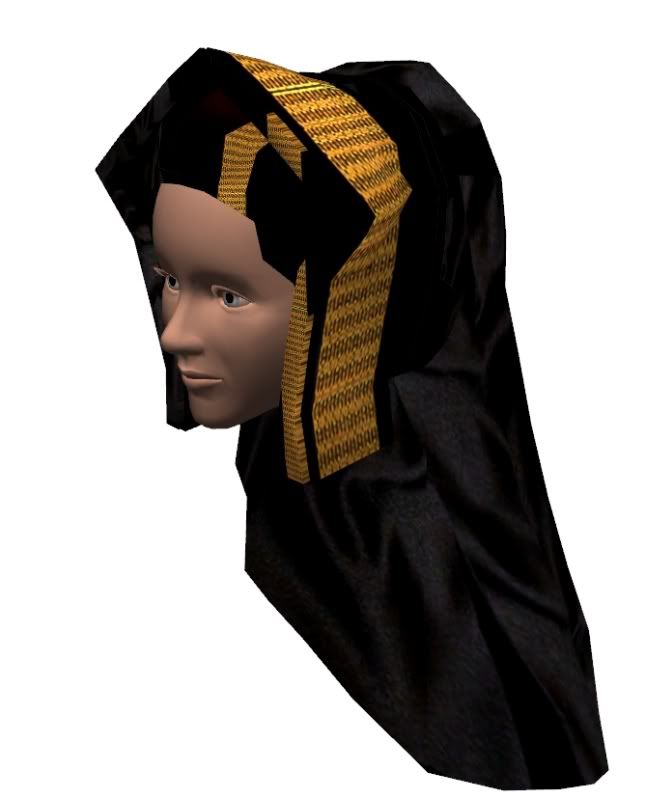
I've also tried it in TSRW, with different UV issues:
*Side note: I am also having problems with the Directx mesh tool to make all my LODs (it will only cut about 100 polys off, that's IT). So I have used the same LOD00 for everything for now. I don't know if that is relevant or not, just thought I'd put that out there.
13th May 2010 at 2:27 PM
Posts: 4,419
Thanks: 2483 in 21 Posts
Maybe you need to make the package with Delphy's DABOOBS?
http://www.modthesims.info/download.php?t=358682
13th May 2010 at 3:07 PM
Posts: 91
Thanks: 179 in 1 Posts
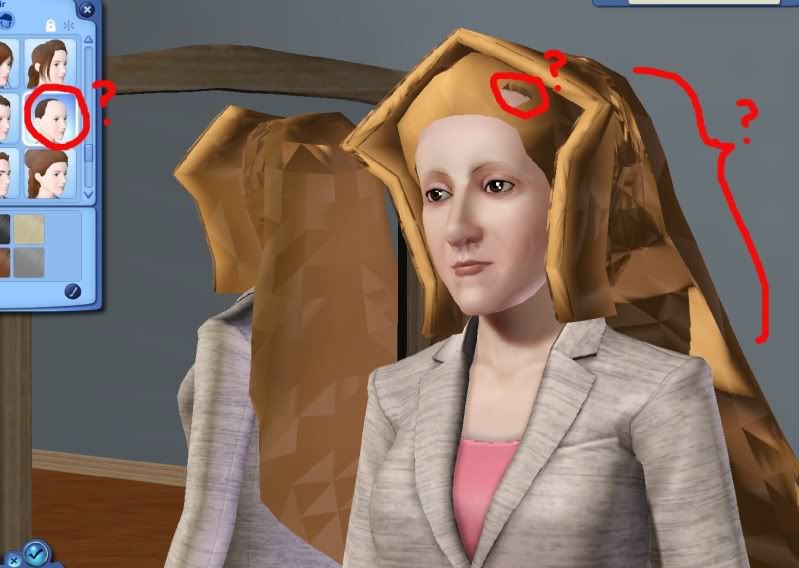
As you can see, it doesn't quite work right either. A part of the mesh seems to be missing, and it maps to the haircolor. Also, the thumbnail shows a different pic. When I tried to go into the game from CAS, I got CTD.
13th May 2010 at 3:33 PM
Posts: 4,419
Thanks: 2483 in 21 Posts
Try making it as a accesoire since there is not really hair involved.
I am a noob when it comes to hairmeshes but know all about accesoires :D
Would personally make it a accesoire as its easier to create the files for recoloring.
13th May 2010 at 4:00 PM
Posts: 4,161
Thanks: 70052 in 93 Posts
There was a thread I started in this forum on CTU vs DABOOBS for help with converting the Plantsim hat hair from TS2 - if you have a look through it, it has screenies that show the difference between making the plantsim hair in CTU and in DABOOBS. The hair came out perfect in CTU but doesn't stay on in the bath (so you have to give your sim the 'Never Nude' trait), but when I made it with DABOOBS (where it does enable 'Naked'), it came out with weird splodges in random places on the sim's head and some of the mesh was missing. http://www.modthesims.info/showthread.php?t=391312
I'll be interested to see what happens if you try what Base says, make it an accessory and see how that comes out - as I mentioned in the Henry VIII thread, I've had problems converting other people's TS2 cc too (but no problems converting Maxis-made items). Hope it works!
13th May 2010 at 4:30 PM
Posts: 4,419
Thanks: 2483 in 21 Posts
13th May 2010 at 4:51 PM
Last edited by EsmeraldaF : 13th May 2010 at 5:05 PM.
Posts: 4,161
Thanks: 70052 in 93 Posts
EDIT: I've just opened it - it has THREE separate base texture files, for three different parts of the mesh. I never meshed for TS2 and I don't know how they dealt with having three different base textures, but in TS3, the CTU only allows for one base texture file. Likewise, the mesh has three separate parts and they're all UV mapped separately. I'm not that experienced in meshing, so Base will probably have a much better idea, but my guess is that you'll need to do some serious re-UV mapping, to get all the bits onto one map instead of three, and remake the base texture file accordingly.
13th May 2010 at 6:44 PM
Last edited by Ahlaam21 : 13th May 2010 at 7:47 PM.
Posts: 91
Thanks: 179 in 1 Posts
*edit* Just saw what you said, and wanted to point out that THIS time I used a regular hair. I've also tried a hat hair too, with similar results... so I am at a loss now!
*edit again*
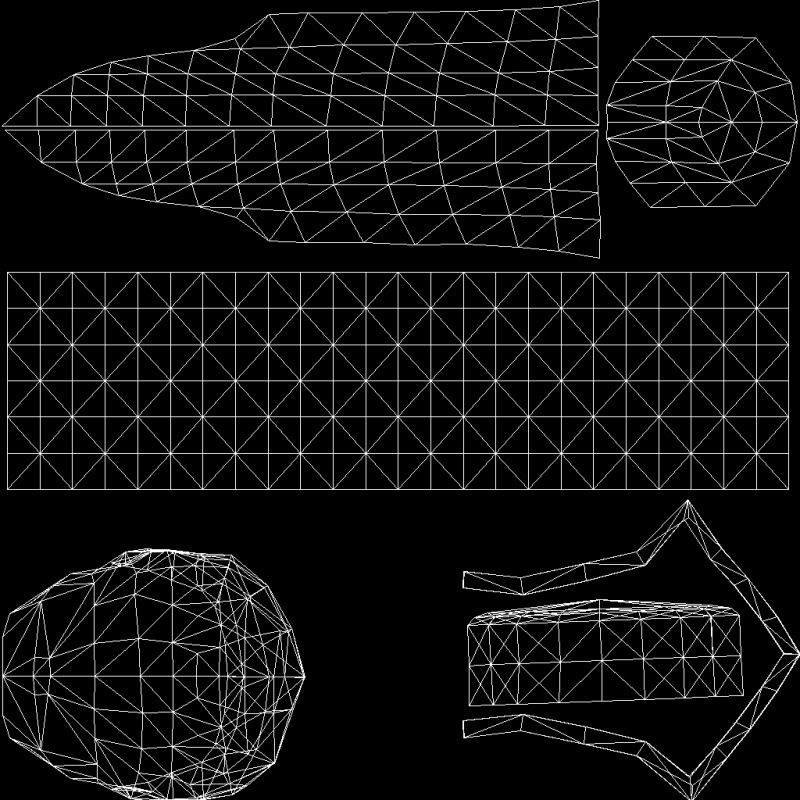
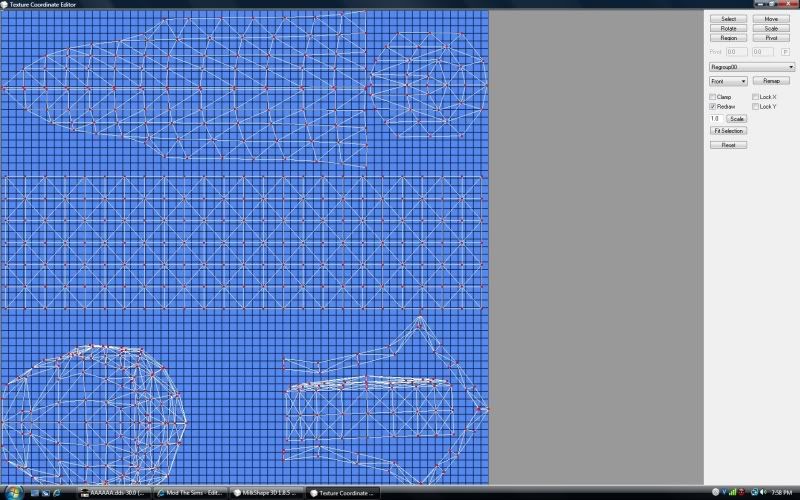
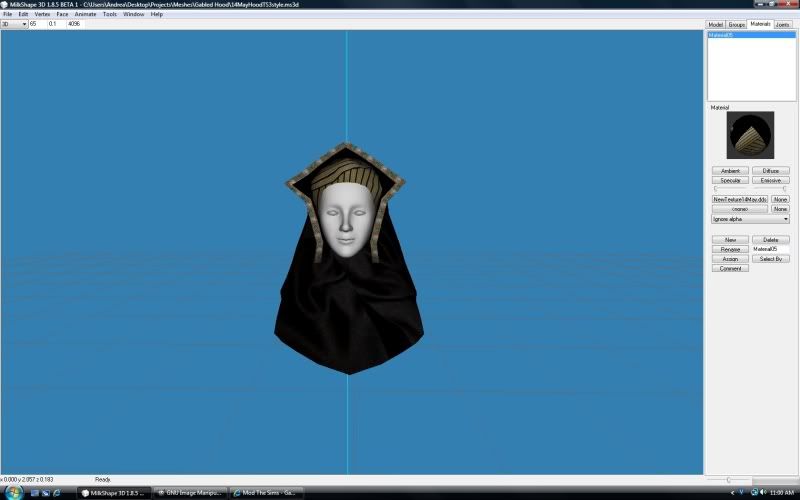
Here is a copy of the NEW uv map... it shows up in milkshape with the blue background though.
SO- tried making it as an accessory as well, similar problem. I guess the UV map is borked.
You kn ow, I just noticed that the pattern of the UV map is the same as the triangle junk on the hat. So, there is a UV map issue, but how to fix it? It's registering those lines on there and it shouldn't be.
13th May 2010 at 8:26 PM
Posts: 4,161
Thanks: 70052 in 93 Posts
13th May 2010 at 9:07 PM
Posts: 4,419
Thanks: 2483 in 21 Posts
13th May 2010 at 11:04 PM
Last edited by Ahlaam21 : 14th May 2010 at 2:02 PM.
Posts: 91
Thanks: 179 in 1 Posts
14th May 2010 at 12:00 AM
Posts: 4,419
Thanks: 2483 in 21 Posts
Never seen something like this...The uvmap itself looks good but assigne a patterned material to it and you see its all messed up.
You better start over, if you want to repair this one you need to regroup the parts(and its reversed parts) and reuvmap them...
Has the original mesh also these issues?
14th May 2010 at 12:08 AM
Posts: 91
Thanks: 179 in 1 Posts
14th May 2010 at 1:48 AM
Posts: 4,419
Thanks: 2483 in 21 Posts
Its in the mesh itself.
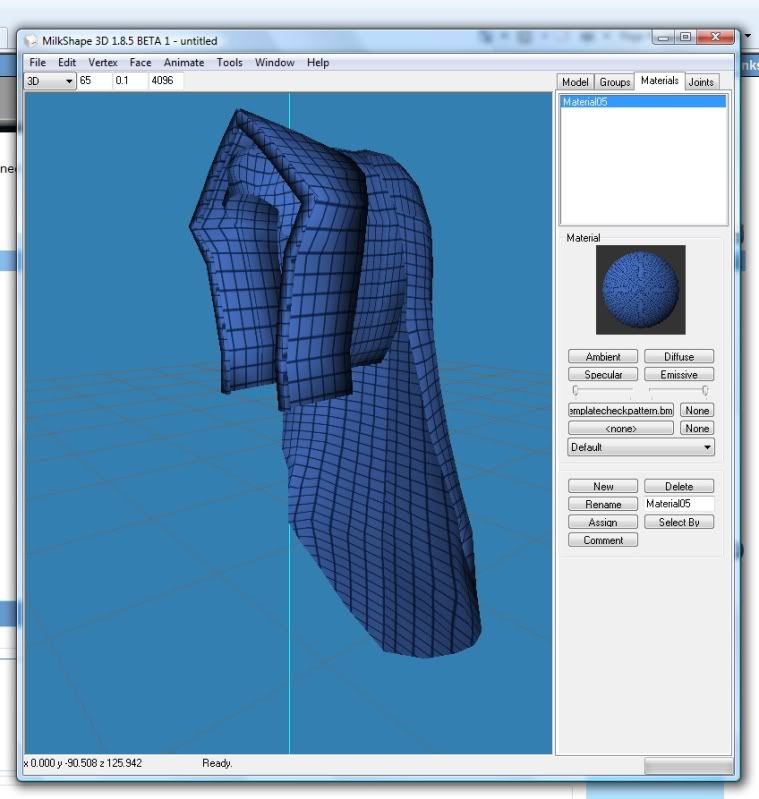
If you are in Milkshape you select the whole mesh and assigne a pattern to it, you will see its messed up.
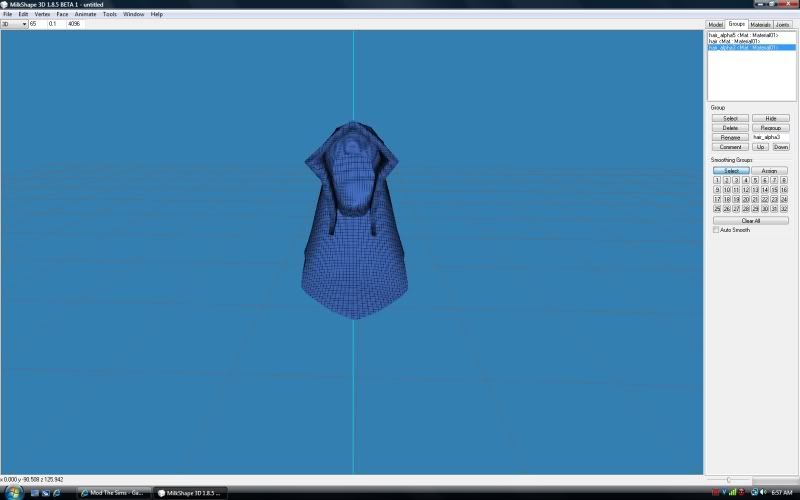
You kinda did this already in your first Milkshaope screenshot, you can see that the textures are all over the place on the back part of the hood.
This aint a problem if you give a solid black color tho.
another problem, and that is prolly the reason you posted are the black spots and the lightning issues.
Few are caused by little meshfaults and reversed faces but i suspect you forgot to fix the normalmap also, its a texture in your package.
You need to add/change it to a blanc grey texture(copy one from a shoe mesh.)
Reversed faces give problems within CAS, dont know why(some settings)
I bet that the hood looks much better when ingame, but still should be fixed tho
14th May 2010 at 1:50 AM
Posts: 91
Thanks: 179 in 1 Posts
When I did put all the right textures in the right places, it didn't matter so I just dumped the same one in everywhere to get SOMETHING to show up. But, I'll start from the beginning, and extract the mesh from the TS2 hood. Maybe then I can figure it out.
I WAS following HP's hair tutorial (which, I've used before w/no problems), do you suggest something different? And which program should it be packaged in to 'work' the best... hmm. Ha- OR which is the easiest for me I guess!
*edit*
When I open the .obj file in Milkshape, I assigned the blue grid pattern to it, and it looks perfect to me...
So I guess my question is, if this is wrong, how do I make it right?
14th May 2010 at 3:36 AM
Posts: 4,419
Thanks: 2483 in 21 Posts
You should be able to see that pattern back on the mesh in 3d view.
It shows up properly on the front part(bit stretched) but the back part is heavily distorted.
This shouldn't be a problem altho you will not be able to use the CAS patterns when recoloring, but a solid color will cover it up.
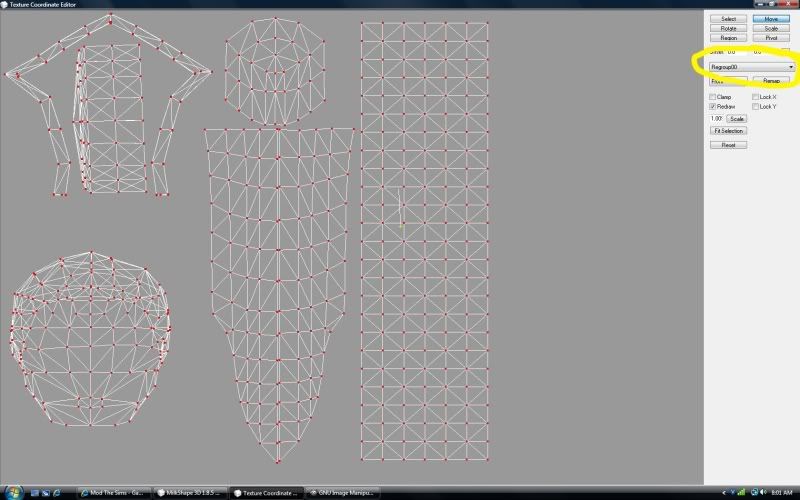
If you take a look at the uvmap you see that the parts are mapped from one side.
You must have seen uvmaps before, the shape should be folded out on the uvmap in order to texture it properly.
You see that faces cross eachother on the map, also the outside and inside parts(layers) are mapped on top of eachother and while this wasn't a problem with sims 2 it does give problems with sims 3.
Especially in CAS this gives strange kinda shading/lightning issues.
But check the hood out ingame, you will be surprised.
Remapping it wont be easy, you need to splitup the diffrent parts(also the inside and outside layers) and remap them.
14th May 2010 at 1:03 PM
Last edited by Ahlaam21 : 14th May 2010 at 1:21 PM.
Posts: 91
Thanks: 179 in 1 Posts
Granted, there are still 3 uv maps, one for each part. The question is, when I combine them for the TS3 mesh, what happens to the UV map? To me, it looked like everything was piled on top of each other and jumbled together so I just made the new UV map where everything was side by side.
So now I at least know that it was MY fault, and not the original that was creating the problem. lol!
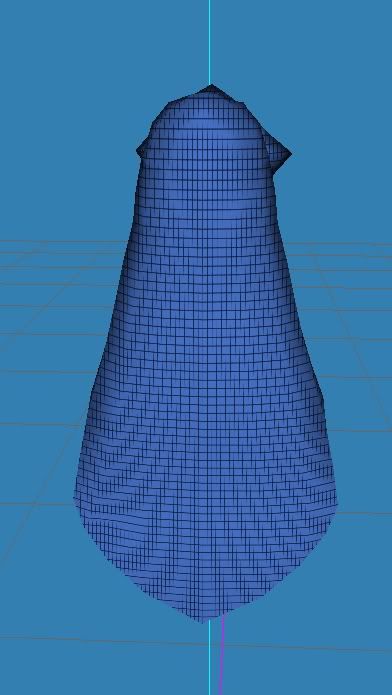
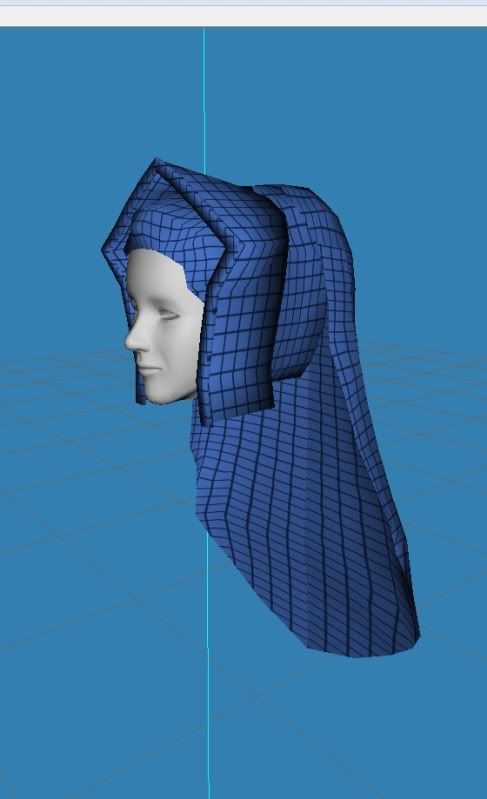
Now, here is the mesh, moved around a bit to fit a TS3 face.
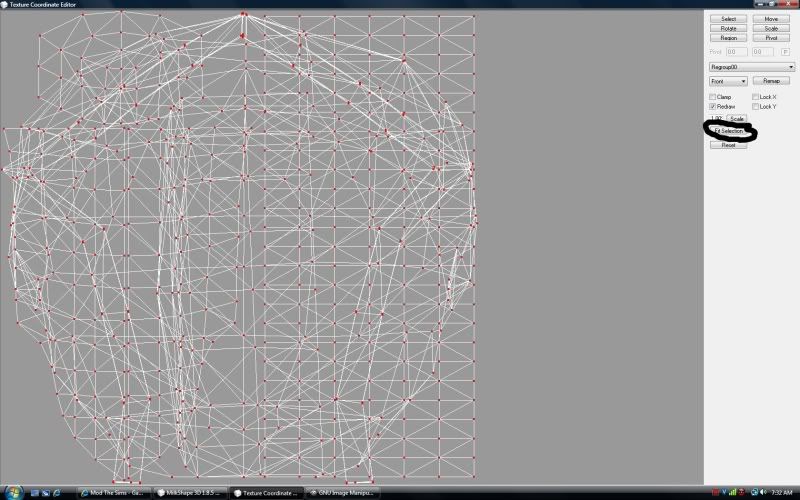
The UV map LOOKS perfect, but when I check it in Texture Coordinator there is nothing there... but, I believe this one has nothing done to it yet, ie normals aligned etc. I can't remember at this point if that matters or not. Geez, what a mess I've made!
14th May 2010 at 1:14 PM
Last edited by Base1980 : 14th May 2010 at 1:27 PM.
Posts: 4,419
Thanks: 2483 in 21 Posts

You should place all parts outside the uvmap, do this for all 3 meshgroups.
Make sure you place all parts in a difrent spot!
Then regroup the 3 meshgroups and go back to the uvmap.
Now place all parts back on the map, you prolly have to scale them down to make it all fit.
Thats it.
Tip,
Save the file as in Milkshape format(Ms3d)
Open that file with a uvmapper(Lithunwrap)
Extract the uvmap so you can use it as template for your textures
Edit,
Oh, the parts aren't visible on the uvmap?
that kinda suks....you sure you had the mesh fully selected?
Try fit selection, its possible the parts are positioned outside the uvmap
14th May 2010 at 1:28 PM
Posts: 91
Thanks: 179 in 1 Posts
*Just to be clear, before I start...You mean I should move all the meshgroups around seperately to get them to fit the TS3 face, save each meshgroup seperately (as a ms3d). Regroup the meshes and save them as ms3d (or .obj?). Import the old uvmaps to lithunwrap and use those to COMBINE the UV maps into one nice TS3 uv map? Then import back to my already regrouped meshes (as one) and save.
*edit*
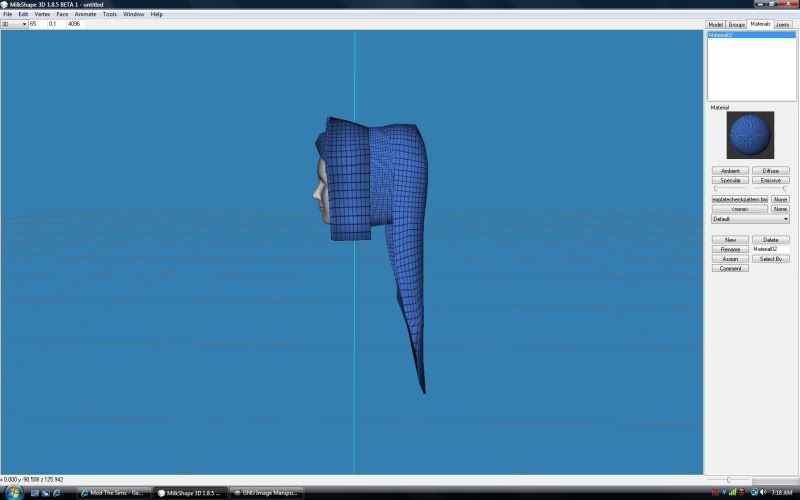
WELL- It looks perfect, until I try remapping in TCE to front, side, bottom etc. Then the map gets a bit warpped on the side.
14th May 2010 at 1:33 PM
Posts: 91
Thanks: 179 in 1 Posts
Now it shows up, however the backgound isn't the blue grid even though it is assigned to the mesh. Hmm
14th May 2010 at 1:48 PM
Posts: 4,419
Thanks: 2483 in 21 Posts
Scale the uvmap smaller, it will popup
Move the parts a bit closer to your texture map.
Forget the external uvmap story.(you only need that for texturing)
Just take the original mesh(with the 3 meshgroups) and follow my instructions.
* select the 1st meshgroup, go to the uvmap and move it
* select the 2nd meshgroup, and do the same(just put it on a difrent spot)
* Same with the 3rd
* Then regroup the 3 meshes into one group
* Repostion all the parts on your uvmap texture(by scaling/rotating/moving them)
If you cant figure it out, upload the correct mesh.
and delete the uploads from post 11(to save some space :D)
14th May 2010 at 2:04 PM
Last edited by Ahlaam21 : 14th May 2010 at 3:23 PM.
Posts: 91
Thanks: 179 in 1 Posts
Voila. Gee, you'd think I'd never done this before, as much as I screwed it up!
:lovestruc Did I mention that you are TOTALLY awesome for helping me?
**Edit*
At this point I am assuming I can go ahead and make my object files and lods... the UV map is correct, and the mesh is reshaped for TS3.
 14th May 2010 at 3:23 PM
Posts: 4,161
Thanks: 70052 in 93 Posts
14th May 2010 at 4:17 PM
Posts: 4,419
Thanks: 2483 in 21 Posts
Dont know if you did already but the screeny still shows the parts in the grey area.
Last thing is to move the combined meshparts onto the 1024x1024 uvmap texturefile.
However,
I suspect you still will have lightning/shading issues when you going to view the hood in CAS but not ingame.
A perfect sims 3 uvmap requiers that you split up the inside and outside layers wich is in this case pretty difficult for beginners.
If your going to try this you need to split up the meshgroups again in a total of 12, then regroup the outside layers into one group and the inside layers into one group.
Then move one meshgroup away from the uvmap, regroup both together again and rescale both again so they fit the uvmap.
Another way is to scale the inside layer slightly away from the outside layer, according to HP this will also fix the shading/lightning issues in CAS.
If you have a closer look at the backpart of the hood this is already done on your mesh.
You might have to do the other parts also.
Go test it first and see how it looks.
When i have meshes like this i normally delete all the inside layers.
I fix the uvmap for the outside layers, texture it and test it.
when completly satisfied with it i copy the outside layer, reverse the faces/alligne normals and give the inside layer its own place(and textures) on the uvmap.
Then i regroup them back to one meshgroup.
Before i regroup the outside and inside layer i save the outside layer so i can use it to make the lod2 and lod3 meshes.
14th May 2010 at 5:03 PM
Last edited by Ahlaam21 : 14th May 2010 at 5:23 PM.
Posts: 91
Thanks: 179 in 1 Posts

It's exactly right. Wow. That was so easy once you told me HOW to fix it... lol. I haven't ever done a hair/hat this complicated, so I guess that was my problem.
**edit** now my only little problem is scaling down the poly count for each LOD... my directX mesh tool doesn't seem to be working, but I'll see what I can do. **I used the clean tool, and now it works. YAY!
Who Posted
|
|