 Sign in to Mod The Sims
- Site Map >
- Modding and Creation >
- Sims 2 Creation >
- Body Shop >
- Body Shop - Recolouring >
- [SOLVED] Recoloring Edited Eyes in SimPE?
- Site Map >
- Modding and Creation >
- Sims 2 Creation >
- Body Shop >
- Body Shop - Recolouring >
- [SOLVED] Recoloring Edited Eyes in SimPE?
 29th May 2018 at 10:12 AM
Last edited by Primavera : 10th Jun 2018 at 12:05 PM.
29th May 2018 at 10:12 AM
Last edited by Primavera : 10th Jun 2018 at 12:05 PM.
Posts: 989
Thanks: 196 in 6 Posts
1) I extract the file from BodyShop and open GIMP
2) I only did the Ellipse tool part to capture the iris, not the sclera
3) I would play around with the Color options, change the hue and/or saturation
4) I would edit the Levels sometimes. I can't sharpen because then it would come out too pixelated, so I leave it as is
5) I would overwrite the texture.bmp and refresh BodyShop. It would come out looking great, but I just realized earlier tonight that if I zoomed in the mannequin it came out blurry. The texture.bmp in GIMP is blurry too if I zoom in too close
6) I just tried importing the recolor into the game to see how it looked and it came out looking blurry around the edges and on the eye itself, like the original Maxis eyes, instead of sharp and clear like fanseelamb's
I did some searching and I found some old threads of recoloring eyes in SimPE? Like, you can export and open it in DXT3/5(?), sharpen/smooth, and then import in the gme? Is that right or did I read it wrong? I found something similar to this but with skintones but that's another story for later. I didn't think of taking screenshots of my project but I will take some if you need any. Thanks to anyone who answers
 .
29th May 2018 at 12:37 PM
.
29th May 2018 at 12:37 PM
Posts: 12,932
Thanks: 3 in 1 Posts
Bodyshop can sometimes give a blurry result, and using DXT to change the texture will help fix this.
In SimPE, use a PNG, import with DXT3 or 5 (doesn't matter which - the difference between them is the alpha, not the texture). Use "none" in the "sharpen" tool.
How to install (scroll down a bit) - http://simscommunity.info/social/th...-time-use.4113/
Or here: https://www.tapatalk.com/groups/moo...impe-t1197.html (no pictures)
Basics of how to use (this shows how to recolor a default replacement, but using the DXT tool works the same for non-defaults, too) - https://www.tapatalk.com/groups/moo...simpe-t526.html
You may also want to compress the files after, because changing the texture in SimPE will sometimes make the file size very large.
My stories: Anna's diary - Memories are forever - Little Fire Burning
30th May 2018 at 1:00 AM
Posts: 989
Thanks: 196 in 6 Posts
|
Eyes have a very small texture, so they'll most likely come out a little blurry no matter what you do. Bodyshop can sometimes give a blurry result, and using DXT to change the texture will help fix this. In SimPE, use a PNG, import with DXT3 or 5 (doesn't matter which - the difference between them is the alpha, not the texture). Use "none" in the "sharpen" tool. How to install (scroll down a bit) - http://simscommunity.info/social/th...-time-use.4113/ Or here: https://www.tapatalk.com/groups/moo...impe-t1197.html (no pictures) Basics of how to use (this shows how to recolor a default replacement, but using the DXT tool works the same for non-defaults, too) - https://www.tapatalk.com/groups/moo...simpe-t526.html You may also want to compress the files after, because changing the texture in SimPE will sometimes make the file size very large. |
I already have SimPE installed, but I'll have to review the path files to make sure they're in the right place, I didn't mess with it after I installed it for the first time. But thank you for this info, I'll work on this soon
31st May 2018 at 4:10 AM
Posts: 989
Thanks: 196 in 6 Posts
 . When it put it back in the color showed up as the original gray instead of showing my hazel recolor .png file. Do I have to overwrite the old SimPE package file, or do I have to edit the eye color in GIMP and then export it to SimPE? The tutorial is pretty vague to me and I'm still kind of confused.
31st May 2018 at 1:46 PM
Last edited by simmer22 : 3rd Jun 2018 at 2:34 AM.
. When it put it back in the color showed up as the original gray instead of showing my hazel recolor .png file. Do I have to overwrite the old SimPE package file, or do I have to edit the eye color in GIMP and then export it to SimPE? The tutorial is pretty vague to me and I'm still kind of confused.
31st May 2018 at 1:46 PM
Last edited by simmer22 : 3rd Jun 2018 at 2:34 AM.
Posts: 12,932
Thanks: 3 in 1 Posts
My stories: Anna's diary - Memories are forever - Little Fire Burning
31st May 2018 at 9:39 PM
Posts: 989
Thanks: 196 in 6 Posts
| You need to make sure you've saved as 24 bit PNG if you're changing the texture in SimPE. Saving the worng way in GIMP can cause weirs texture issues. |
I will try that when I get home tomorrow. Slowly but surely I'm working on it.
3rd Jun 2018 at 1:47 AM
Posts: 56
3rd Jun 2018 at 3:18 AM
Posts: 989
Thanks: 196 in 6 Posts
| I have used PSP7 to recolor eyes through bodyshop. So far the eyes are clear, beautiful color. I used transparent layers with transparent colors with the paint hardnrss settings on around 20% and the opacity set to 6 to 25 depending on how strong I want the colors to show. Once done, I merge all layers and save as png. I can't upload as I don't have internet access, only phone access. |
I also use transparent layers with GIMP, and I sometimes would mess with the opacity. I'm gonna try this again to see if anything changes. Maybe this time it'll work.
3rd Jun 2018 at 5:40 AM
Posts: 989
Thanks: 196 in 6 Posts
1) Opened SimPE with the file. Right-clicked 'Build DXT' and then 'Open Image' and chose the .png of a recolor I did before in GIMP. Selected 'none' under 'Sharpen' and then hit 'Build'. Then hit 'Commit'
2) Updated the 'jpg/tga/png Image' with the swatch I exported and recolored. Right-clicked and hit 'Replace' with the new swatch
3) Opened the 'Texture Overlay XML (XTOL)' and changed the strings. I used this tutorial mixed with this tutorial to change the 'genetic', 'creator', 'version', 'product', and 'flags' strings. I changed the 'name (dString)' thread to the color of the eyes. Hit 'commit' on all of them
4) 'Saved As' to my Downloads folder and opened it in Bodyshop; the swatch works and the eyes came out good, and this is the result ;-;
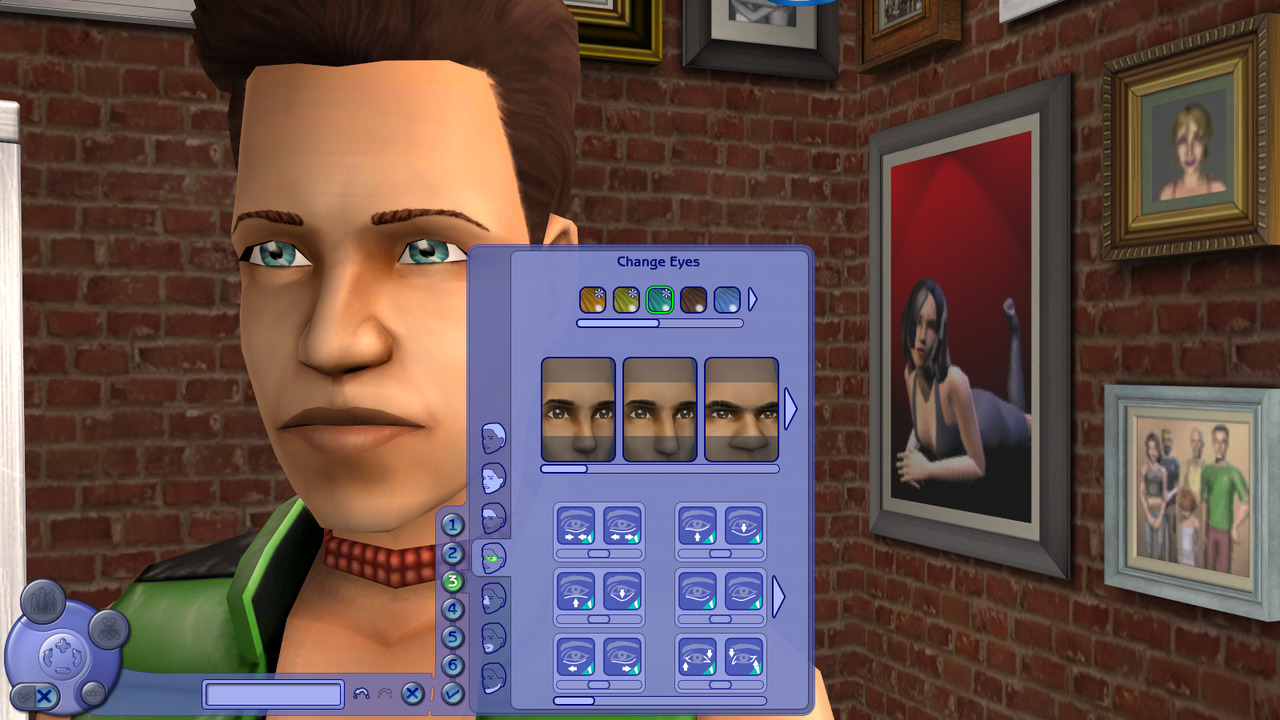
I'm gonna write a tutorial about this once I get this down pat but I'm on cloud 9 right now :lovestruc.
3rd Jun 2018 at 8:53 AM
Posts: 989
Thanks: 196 in 6 Posts
. I guess it's because I used the same file to make the recolors then?
3rd Jun 2018 at 7:18 PM
Posts: 12,932
Thanks: 3 in 1 Posts
Make sure you're clicking "import to game" and use the files that end up in SavedSims (they'll have an 8 digit hex number followed by _ , so something like "5f1bfd3f_projectname". Don't do anything to the package files in the Project folders, because they won't show ingame (they're templates, and lack important resources). You can reuse the same project multiple times, and instead give the SavedSims files new names. Saves you from cluttering up the Project folder too much (some projects can take up several MB of space, particularly hairs and skins).
My stories: Anna's diary - Memories are forever - Little Fire Burning
3rd Jun 2018 at 10:03 PM
Posts: 989
Thanks: 196 in 6 Posts
|
You made a new file for the recolor, right? Everything you want to show up in Bodyshop and ingame needs to first be made as a separate file using Bodyshop. If you want to make 10 eyes, you need to make 10 files with separate numbers. Make sure you're clicking "import to game" and use the files that end up in SavedSims (they'll have an 8 digit hex number followed by _ , so something like "5f1bfd3f_projectname". Don't do anything to the package files in the Project folders, because they won't show ingame (they're templates, and lack important resources). You can reuse the same project multiple times, and instead give the SavedSims files new names. Saves you from cluttering up the Project folder too much (some projects can take up several MB of space, particularly hairs and skins). |
I don't think I did @simmer22 :0. I didn't go through Bodyshop for the recolor, however, I found out I could export the eye image from SimPE and it kept it's texture quality unlike if I exported from Bodyshop (exporting from SimPE makes it a 512 x 512 .png file with less pixels). I did try to give it hex numbers, but it was 7 instead of 8, so I will try this again later. It's just this particular color not showing up, the other one shows up fine.
3rd Jun 2018 at 10:41 PM
Posts: 12,932
Thanks: 3 in 1 Posts
---
You can make textures larger in Bodyshop. Just make sure to resize both the texture and the alpha, keep the same dimensions, and make absolutely sure you only use sizes with (1,2,4,8,16,32 and 64 are rarely used),128,256,512 and 1024 (2048 also, but only if absolutely necessary) in them. Any number even one pixel larger or smaller will make Bodyshop confused, and the files won't work.
Also keep in mind that there's no point to scaling up anything that overlays skins (SimSkin setting in the TXMT, makeup, eyes, top/bottom/body part of clothes, "head" part of hairs, and a few other things), because these wll automatically use the size corresponding to the skin, NOT the texture. (As an example, I often use 1024x1024 textures for infant outfits, but I've also scaled up my most used skintones to that size, so they show the proper texture. Skins with bodies in the regular 512x512 size still shows the clothes as 512x512, meaning they're blurry on those skins).
My stories: Anna's diary - Memories are forever - Little Fire Burning
3rd Jun 2018 at 11:53 PM
Posts: 989
Thanks: 196 in 6 Posts
|
That's not how recolors work. There are several components to them, among them names of the resources. The easiest way is to make a bunch of files with the same project in Bodyshop (no need to change the textures, because you're going to change them in SimPE anyway), and do the rest in SimPE. --- You can make textures larger in Bodyshop. Just make sure to resize both the texture and the alpha, keep the same dimensions, and make absolutely sure you only use sizes with (1,2,4,8,16,32 and 64 are rarely used),128,256,512 and 1024 (2048 also, but only if absolutely necessary) in them. Any number even one pixel larger or smaller will make Bodyshop confused, and the files won't work. Also keep in mind that there's no point to scaling up anything that overlays skins (SimSkin setting in the TXMT, makeup, eyes, top/bottom/body part of clothes, "head" part of hairs, and a few other things), because these wll automatically use the size corresponding to the skin, NOT the texture. (As an example, I often use 1024x1024 textures for infant outfits, but I've also scaled up my most used skintones to that size, so they show the proper texture. Skins with bodies in the regular 512x512 size still shows the clothes as 512x512, meaning they're blurry on those skins). |
I actually didn't scale it up, SimPE did that automatically. It didn't turn out blurry because it was 512 x 512, it kept the quality when I put it in my Downloads folder. And sorry if I sound redundant, I have a hard time understanding instructions but I appreciate your knowledge and your help with this
. I'll do this method soon as well.
4th Jun 2018 at 9:51 AM
Posts: 989
Thanks: 196 in 6 Posts
4th Jun 2018 at 10:51 AM
Last edited by simmer22 : 4th Jun 2018 at 9:41 PM.
Posts: 12,932
Thanks: 3 in 1 Posts
To make eye recolors, open up Bodyshop, go to the eye section, click on one of the eyes (preferably the EAxis eyes because they'll give a working custom version), make a new project and name it something you can recognize. Wait for it to load, and when it does you can write something in the tooltip line, and click "import to game". Then click the back arrow until you get the screen with "load saved project" (the bottom box, the top box says "make new project"). Click on the "Load Saved project", click the project you just made, and wait for it to load. Then (you can write something new in the tooltip box if you want) click "import to game", and do this as many times as you need files for our eyes. Don't worry about the textures yet.
(You can change the textures before clicking "import to game", but since you get those small textures (there's a fix for that, btw) you might as well change them in SimPE).
When you have enough files, close Bodyshop.
Then open up SavedSims. Your files should all have the same name after the first 8 digit number. Sort by date to find them all.
Now you can edit the files in SimPE. You shouldn't have to do anything other than replace the textures (apossibly the thumbnail picture? Can't remember if you hae to make custom ones for eyes), maybe also rename the tooltip.
DO NOT TOUCH the package files in the Project folder! They're templates, NOT working files you can put in your game.
Also DON'T EVEN TRY to make new CAS files in SimPE. It might be possible, but if so it's quite advanced stuff, and a whole lot faster and easier to do in Bodyshop. Except for a few cases, you can "only" use SimPE to make object recolors and default replacements for textures. You can of course edit CAS files after making them in Bodyshop (I do, all the time), but making them from scratch would quite frankly be a whole lot more work and more time consuming than waiting for Bodyshop to load...
My stories: Anna's diary - Memories are forever - Little Fire Burning
4th Jun 2018 at 11:50 PM
Posts: 989
Thanks: 196 in 6 Posts
|
Umm... what? I think you're still trying to use the Project files, or try to make files from scratch in SimPE - and that's NOT how you make CAS recolors. To make eye recolors, open up Bodyshop, go to the eye section, click on one of the eyes (preferably the EAxis eyes because they'll give a working custom version), make a new project and name it something you can recognize. Wait for it to load, and when it does you can write something in the tooltip line, and click "import to game". Then click the back arrow until you get the screen with "load saved project" (the bottom box, the top box says "make new project"). Click on the "Load Saved project", click the project you just made, and wait for it to load. Then (you can write something new in the tooltip box if you want) click "import to game", and do this as many times as you need files for our eyes. Don't worry about the textures yet. (You can change the textures before clicking "import to game", but since you get those small textures (there's a fix for that, btw) you might as well change them in SimPE). When you have enough files, close Bodyshop. Then open up SavedSims. Your files should all have the same name after the first 8 digit number. Sort by date to find them all. Now you can edit the files in SimPE. You shouldn't have to do anything other than replace the textures (apossibly the thumbnail picture? Can't remember if you hae to make custom ones for eyes), maybe also rename the tooltip. DO NOT TOUCH the package files in the Project folder! They're templates, NOT working files you can put in your game. Also DON'T EVEN TRY to make new CAS files in SimPE. It might be possible, but if so it's quite advanced stuff, and a whole lot faster and easier to do in Bodyshop. Except for a few cases, you can "only" use SimPE to make object recolors and default replacements for textures. You can of course edit CAS files after making them in Bodyshop (I do, all the time), but making them from scratch would quite frankly be a whole lot more work and more time consuming than waiting for Bodyshop to load... |
So I have to export the textures then import them back in @simmer22? I really am trying to understand these steps. All the other tutorials I've read talked about just exporting the file and editing it as is, not exporting multiple files. And do you have a link for the texture fix you mentioned, or is that I have to do myself? At this point I think I'll just leave it alone, I'm too frustrated (not at you) to do this anymore
5th Jun 2018 at 1:02 AM
Last edited by simmer22 : 5th Jun 2018 at 1:12 AM.
Posts: 12,932
Thanks: 3 in 1 Posts
Making custom eyes is done like I explained above (through Bodyshop).
If you're making default replacement eyes, you need a file with the 5 different eye textures (you can download a default replacement file for eyes as a base, and change the name of the file). Then you change the textures with SimPE using DXT. Keep in mind that you can only have one default replacement for each eye in your Downloads folder (one for each eye if they're separate files, or one file with all 5 eyes included).
My stories: Anna's diary - Memories are forever - Little Fire Burning
5th Jun 2018 at 2:24 AM
Last edited by Primavera : 5th Jun 2018 at 2:43 AM.
Posts: 989
Thanks: 196 in 6 Posts
|
Just to clarify - are you trying to make a default replacement file, or are you trying to make custom (non-default) recolors of the eyes? Things get confusing very fast if you're trying to make one of them and I'm trying to explain the other, and it wasn't clear in your first post. Making custom eyes is done like I explained above (through Bodyshop). If you're making default replacement eyes, you need a file with the 5 different eye textures (you can download a default replacement file for eyes as a base, and change the name of the file). Then you change the textures with SimPE using DXT. Keep in mind that you can only have one default replacement for each eye in your Downloads folder (one for each eye if they're separate files, or one file with all 5 eyes included). |
Oh no, I'm making non-default custom and geneticized eyes for more color options, I already have a default eye replacement mod that I first posted about. As a rehash; I originally did everything I would've done through Bodyshop but they came out blurry around the rim and in the iris and not like default replacement eyes I downloaded in terms of quality (too many pixels), so that's why I started this thread. I tried overwriting the .bmp file with the recolored image I exported from SimPE a few times but Bodyshop would throw an error whenever I tried to refresh, so I thought making them through SimPE would be the solution. But like I said before, they would 'overwrite' the other because of the file name (I guess it's something like 0x0--------!stdMatBaseTextureName) on every Resource Branch I found, but changing that but it didn't really work either. And sorry again if I'm tiring you out, it takes me a few tries to fully understand instructions.
EDIT: okay I finally figured this out @simmer22! I went into Bodyshop and exported a random eye color, dumped a color on it through GIMP, and imported it back in Bodyshop. Like before it came out blurry, but on a whim I edited it in SimPE and put a .png file of the same color over the original, updated the swatch, and saved it. I opened the game and this was what I found
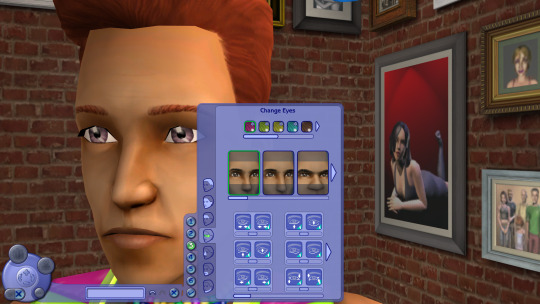
You probably can't see it that well but it worked! The quality matches the others and it looks great! This took way too long for me to figure out but thank you for your patience with me on this, I appreciate all the help you gave
5th Jun 2018 at 10:40 AM
Posts: 12,932
Thanks: 3 in 1 Posts
Another tip is to extract the base texture directly from the source (in your case, the default eyes you wanted to recolor), and put it onto the BMP Bodyshop creates, and then do the changes needed in Gimp. This helps in getting crisp textures (particularly if your Bodyshop makes the textures smaller).
I always save a work file with layers (PSD/TIFF), and you can do so in Gimp too. I think Gimp has its own file format, but PSD is also available as an option. That way it's easier to make more recolors.
My stories: Anna's diary - Memories are forever - Little Fire Burning
5th Jun 2018 at 12:24 PM
Posts: 989
Thanks: 196 in 6 Posts
|
If you use DXT3 or DXT5 texturing in SimPE (as you mentioned in your first post), you'll get a better result (don't use the "update the textures" function - that's only for when you use "import", which often gives a blurred result). Another tip is to extract the base texture directly from the source (in your case, the default eyes you wanted to recolor), and put it onto the BMP Bodyshop creates, and then do the changes needed in Gimp. This helps in getting crisp textures (particularly if your Bodyshop makes the textures smaller). I always save a work file with layers (PSD/TIFF), and you can do so in Gimp too. I think Gimp has its own file format, but PSD is also available as an option. That way it's easier to make more recolors. |
Yep I do that too, I choose DXT3 just because and choose 'none' under Sharpen. I only use one layer for recolors, then I merge down and edit the swatch with the same hex code color. And yes GIMP saves differently than PhotoShop with the later versions, so I have to do 'Export As...' when I'm done because it'll automatically save as an .xcf file. But I figured out how to work around Bodyshop and what I did was export the eye textures from, throw on a fake color and then DDS build the real color I extracted from the default eye SimPE file (it becomes a .png file) over the image, geneticize it, save it to my Downloads, and delete the project eye from my Projects folder, if that makes sense. They would then have unique GUID numbers so there's no overwriting files anymore. I've made 2 more recolors with this method and they came out in the same quality as the others with no distortion or blurriness. I'm gonna write this method down and do a tutorial as well, whenever I get around to doing it.
8th Jun 2018 at 8:56 PM
Posts: 56
8th Jun 2018 at 9:58 PM
Last edited by simmer22 : 8th Jun 2018 at 10:16 PM.
Posts: 12,932
Thanks: 3 in 1 Posts
To make the files show up, you have to do "import to game" when you've edited the textures to your liking, and you can find the finished files in SavedSims.
Dnsouthldy, you're probably doing it right.
| ... But I figured out how to work around Bodyshop and what I did was export the eye textures from, throw on a fake color and then DDS build the real color I extracted from the default eye SimPE file (it becomes a .png file) over the image, geneticize it, save it to my Downloads, and delete the project eye from my Projects folder, if that makes sense. They would then have unique GUID numbers so there's no overwriting files anymore. I've made 2 more recolors with this method and they came out in the same quality as the others with no distortion or blurriness. I'm gonna write this method down and do a tutorial as well, whenever I get around to doing it. |
I... have absolutely no clue what you're trying to do here. Eyes don't have GUID numbers, they have instance numbers. Technically similar, but Bodyshop handles making new ones just fine.
If you're trying to work around the weird texture saving in Gimp, the easiest method is to make a new eye project in Bodyshop, re-use the project several times by doing "import to game" without changing the textures (the new files appear in SavedSims, don't use or do anything to the Package files in the Project folders). You can make the textures (export as PNG files) in Gimp, and you can then replace the textures in SimPE.
It's perfectly safe to re-use projects in Bodyshop, and every file will get unique instance numbers.
I use this method a lot, particularly when making infant outfits (I make the textures, count how many I need, make a recolor project in Bodyshop, and do "import to game" as many times as I have textures. Then I replace the textures and do various other changes in SimPE, before I compress the files with the "Compressorizer" program to save disk space).
My stories: Anna's diary - Memories are forever - Little Fire Burning
9th Jun 2018 at 2:09 AM
Posts: 56
9th Jun 2018 at 1:42 PM
Posts: 12,932
Thanks: 3 in 1 Posts
It has some annoying "bugs" in relations to Bodyshop (saving the BMP files properly, and saving files in general can be a challenge to get right), but other than that it's quite alright.
My stories: Anna's diary - Memories are forever - Little Fire Burning
Who Posted
|
|