 Sign in to Mod The Sims
- Site Map >
- Modding and Creation >
- Sims 2 Creation >
- Body Shop >
- Body Shop - Meshing >
- Tutorial: Create Body Meshes Using Wings 3D! *With Pics*
- Site Map >
- Modding and Creation >
- Sims 2 Creation >
- Body Shop >
- Body Shop - Meshing >
- Tutorial: Create Body Meshes Using Wings 3D! *With Pics*
Replies: 1 (Who?), Viewed: 8387 times.
#1
 7th Jan 2008 at 6:02 PM
Last edited by $RaMRoM$ : 3rd Mar 2008 at 3:25 PM.
7th Jan 2008 at 6:02 PM
Last edited by $RaMRoM$ : 3rd Mar 2008 at 3:25 PM.
7th Jan 2008 at 6:02 PM
Last edited by $RaMRoM$ : 3rd Mar 2008 at 3:25 PM.
Posts: 462
Thanks: 1033 in 20 Posts
Hi and Welcome to this tutorial! Over Here I’m going to teach you how to use wings 3D to
create new body meshes, “However”, The Editing in Wings 3D is Very Limited!!! Since you are
only allowed to MOVE Vertices.
I really want to thank tiggerypum for teaching us the magic of meshing! Thanks a lot tig!
And I also would like to thank HellBorn for his great tool! Without it! We wouldn’t be able
to edit Meshes in Wings 3D!
Now, Moving To the Tutorial!
Here is what you need:
•SimPE – You can Get SimPE from Here
•Bodyshop – Comes With The Sims 2
•Wings 3D – This is the 3D Editor I’ll Be using, Download it Here
•Vertice Mapper – This is a must, Get it here
•Sims 2 Meshtool – Get it
Here
•Tiggerypum’s Tutorial – That is The Basic Tutorial, I’ll explain

Read Tiggerypum’s Tutorial, until you reach step 32, continue here.
The Goal is to delete that dangly thing from the Dress, body mesh.
=================================================================================
Part I: Using the Vertice Mapper:
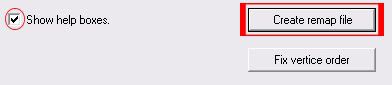
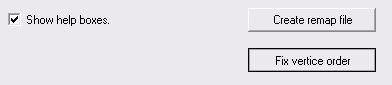
1- Run the Vertice Mapper, Then Click ‘Create remap File’
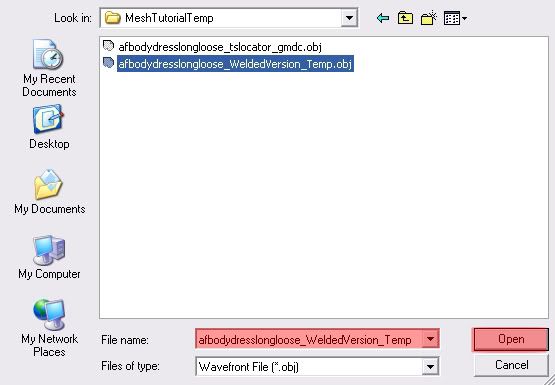
2- A box will tell you that you are supposed to load the mesh, click ‘OK’, Then Choose The
Exported *.obj file from SimPE

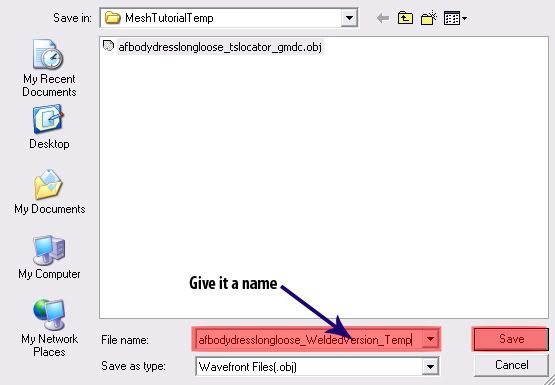
3- Then they will tell you that you have to save a welded version, click ‘OK’ then save it
as afbodydresslongloose_weldedversion_temp.obj
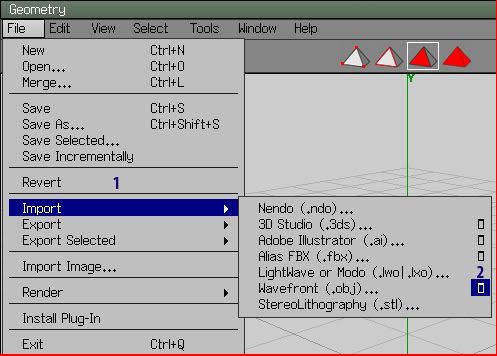
4- Then They will ask you to import the obj to wings 3D using some settings, leave the VM
(Vertice Mapper) and Run Wings 3d, Click File Import and click the little box near the
Wavefront (*.Obj).
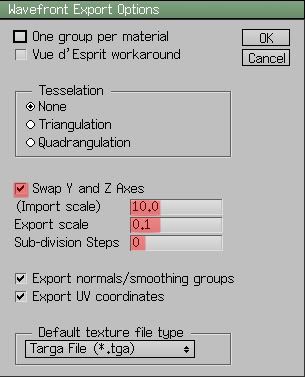
5- Choose These Settings:
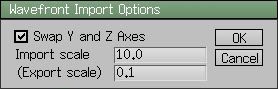
6- Choose the welded Version (the one we saved from the Vertice Mapper)
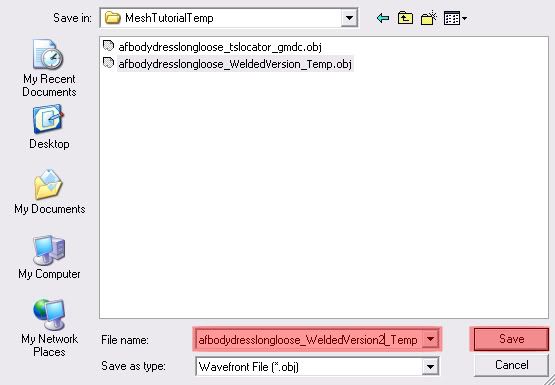
7- Now Don’t Do ANYTHING! Just click File--> Export--> The Box Near WaveFront Obj, and
choose these settings.
8- Give it a name then click Save
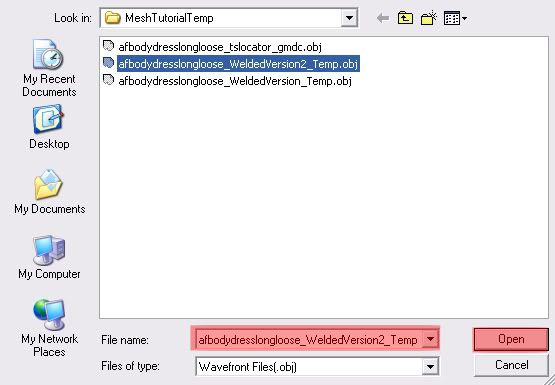
9- Go Back to the Vertice Mapper, Click OK, Click Ok Again, then load your exported Wings
3D Object File
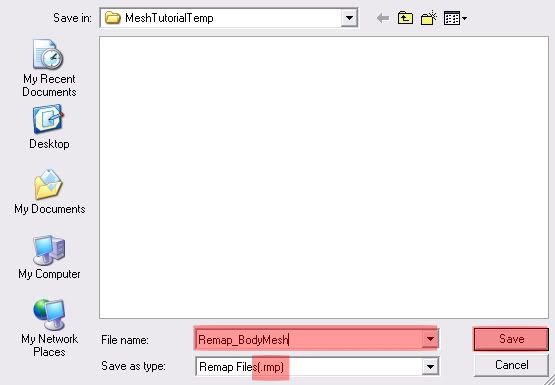
10- Now it will ask you to save an .rmp which is a remap file, click ok and save it in your
tutorial folder
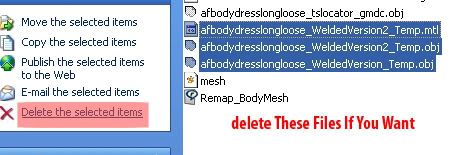
11- Then it will advise you to delete the “Temp” Files, Delete These ones (If You want)
Part II: Editing The Mesh in Wings 3D:
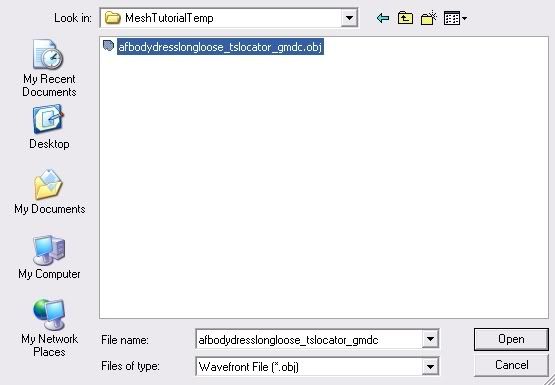
12- Open Wings 3D, File --> Import --> little box near Wavefront Obj, Add the Same Settings
from step 5.
13- Click Ok, and then choose the mesh File
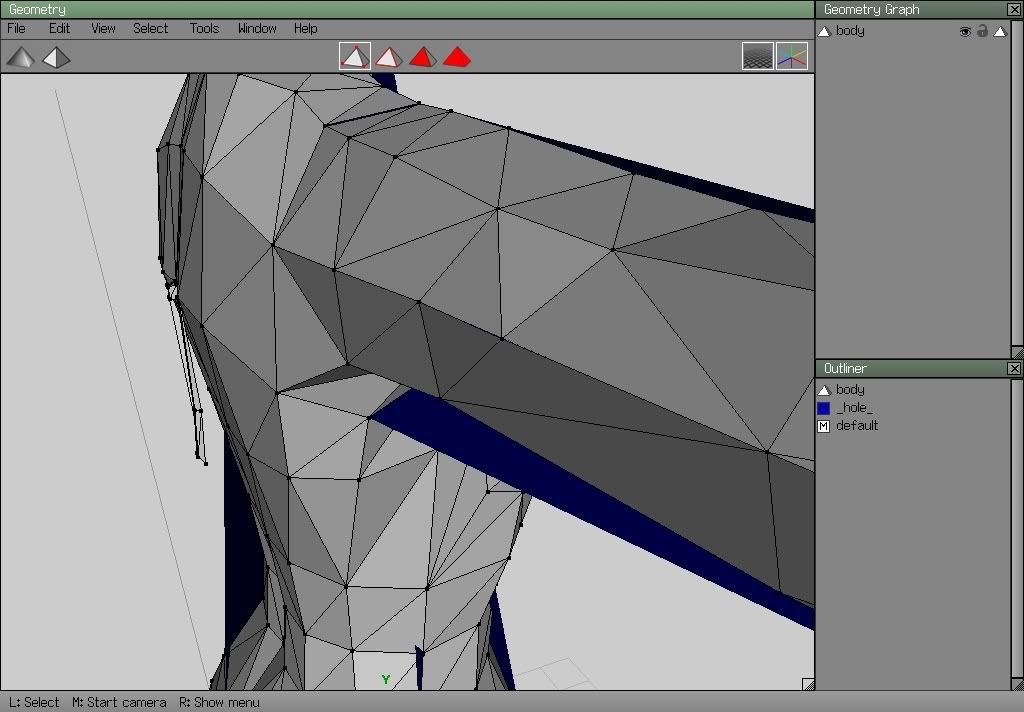
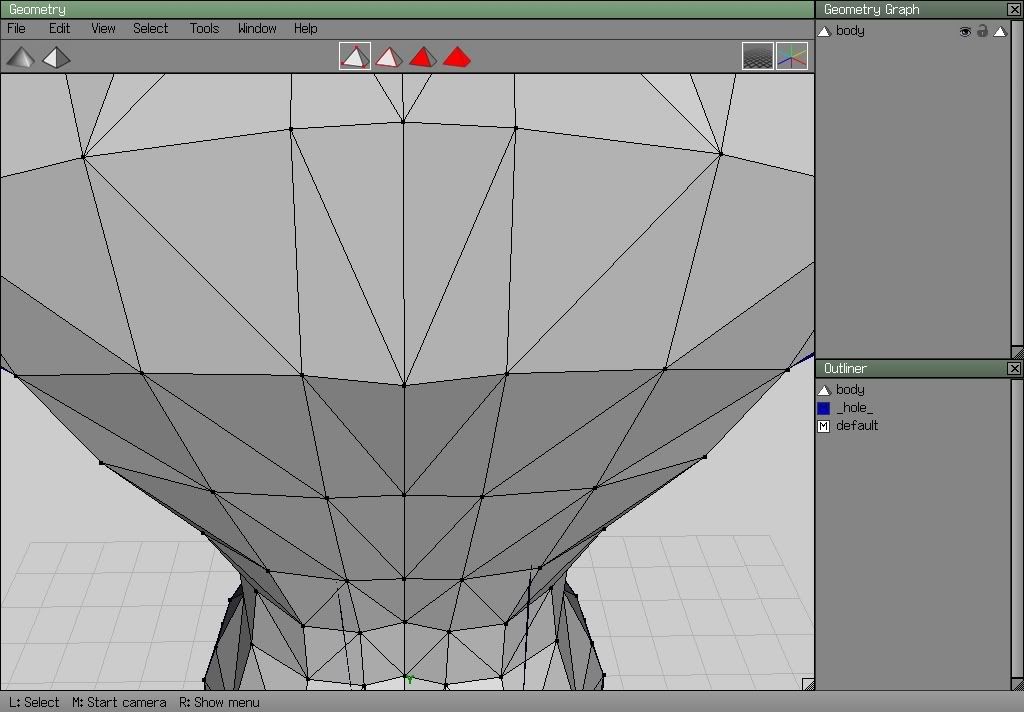
14- You’ll Get an ENORMUS Body Mesh! Zoom Out using the mouse scroll, until you can see the
whole body.
15- Draw A Box Around This Area
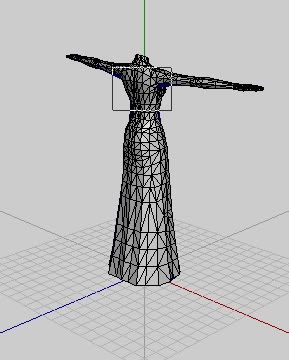
16- Click Shift+A and The Screen will go to the selected area!
17- Make Sure That you are on the First Triangle, Now zoom and Click The Mid Mouse
Button/Mouse Scroll and move the mouse to rotate the view, do that until you get something
like this:
18- Draw a Box Around This Part Of The Mesh
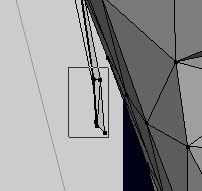
19- Now Right Click--> Flatten--> X
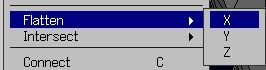
20- Do That again but choosing Y and Z Until you get a small point like this
21- Now Right Click --> Move --> Y and Move The Point way above to the inside of the mesh.
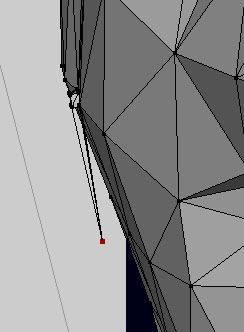
22- Select The Little Boxy Points And Shift+A, click ‘W’ on your keyboard and make sure you
choose these red points (vertices)
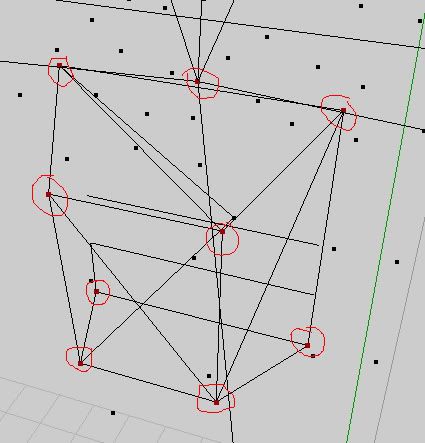
23- Now Right Click--> Flatten --> X, Do That again but choosing Y and Z Until you get a
small point, click ‘W’ and Tadaaaaaaaaaaaa!
24- Now Click ‘R’ To Reset The View.
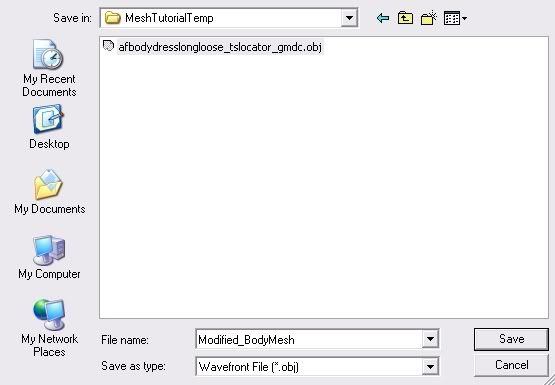
25- File --> Export --> Choose the little box next to Wavefront .obj , choose the Same
Settings From Step 7
26- Save It as Modified_BodyMesh.obj, or body.obj (like tig’s)
Part III: Back To The Vertice Mapper:
27- Run the Vertice Mapper
28- Click ‘Fix Vertice Order’
29- You’ll be asked for the *.rmp File, Click Ok Then Load It
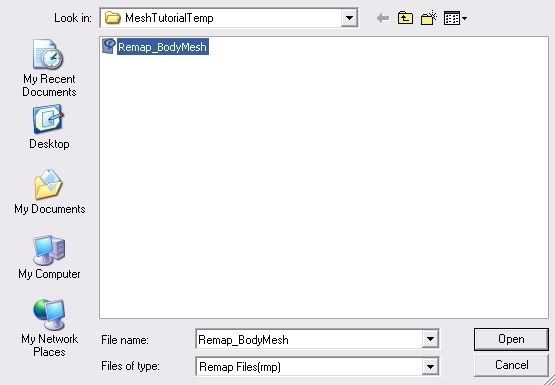
30- Now It will ask you for your mesh, ok, load it

31- Click Ok again.
32- Now Go Back to Tig’s Tutorial, Continue from:
Part VI – Putting Your New Shape Into Your Mesh Package
Thanks for taking the time for reading this tutorial, if you like it then please rate it
high and press the Thanks Button, If you have any question Please, Please… Don’t hesitate to ask me!
$RaMRoM$
BTW, Can a Moderator Please Move The Thread, Thanks :D
Advertisement
#2
6th Dec 2009 at 12:16 AM
6th Dec 2009 at 12:16 AM
Posts: 12
Thanks: 179 in 6 Posts
Thanks a lot for this! I just found about wings 3d so i can mesh (hopefully) in no time~
ok, maybe a little time.
ok, maybe a little time.
Who Posted
|
|