 Sign in to Mod The Sims
- Site Map >
- Modding and Creation >
- Sims 2 Creation >
- Tutorials >
- Objects - Object transparency tutorial
- Site Map >
- Modding and Creation >
- Sims 2 Creation >
- Tutorials >
- Objects - Object transparency tutorial
#1
 13th Feb 2007 at 7:41 PM
Last edited by Echo : 10th Sep 2008 at 1:36 PM.
13th Feb 2007 at 7:41 PM
Last edited by Echo : 10th Sep 2008 at 1:36 PM.
13th Feb 2007 at 7:41 PM
Last edited by Echo : 10th Sep 2008 at 1:36 PM.
Posts: 509
Thanks: 3751 in 28 Posts
Object transparency tutorial
Object transparency tutorial
 It's back with new graphics and new text with new spelling mistakes/typo's
Also on this thread you will find my adding glass transparent effects tutorial for download. I was going to merge the two tutorial's together. But i have decided to leave them in seperate files.
visit my profile here: mike19's profile
Thanks to mts2 and all the moderators
also the makers of SimPE and special thanks to numenor
;;;;;;;;;;;;;;;;;;;;;;;;;;;;;;
Quote:
|
For the time being this tutorial will receive minimal support by me. As i can be quite busy with other things
|
 It's back with new graphics and new text with new spelling mistakes/typo's
Also on this thread you will find my adding glass transparent effects tutorial for download. I was going to merge the two tutorial's together. But i have decided to leave them in seperate files.
visit my profile here: mike19's profile
Thanks to mts2 and all the moderators
also the makers of SimPE and special thanks to numenor
;;;;;;;;;;;;;;;;;;;;;;;;;;;;;;
This tutorial will take you through the process of how to create recolor's by removing parts of the graphics, and so creating the illusion of a see through object. Or if you are successful you can continue to add transparency effects by applying the same technique.
;;;;;;;;;;;;;;;;;;;;;;;;;;;;;;
If you are completely new to recoloring please visit: Recolouring Objects with Object Workshop (NEW tutorial) By numenor
;;;;;;;;;;;;;;;;;;;;;;;;;;;;;;
If you want to or need to clone a object : Sims 2 start to finish Object Creation Tutorial V 2.1 By JWoods
;;;;;;;;;;;;;;;;;;;;;;;;;;;;;;
What you need:
1. simpe
2.jasc paint shop pro or similar such as the gimp
;;;;;;;;;;;;;;;;;;;;;;;;;;;;;;
A. After any changes always commit and save
B. Please do not publish this tutorial on any pay site
C. Ask questions if you get stuck
D. Please do not publicly critise the technique in this tutorial, if you know of another technique write your own tutorial.
E. If you think I have missed something please tell me
 F. "Legacy" Nvidia DDS Utilities legacy dds utilities
 ;;;;;;;;;;;;;;;;;;;;;;;;;;;;;;
Some objects may be too complex for this method. If you do find problems you may have to clone the object and edit the alpha channel or create a new mesh.;;;;;;;;;;;;;;;;;;;;;;;;;;;;;
The object transparency tutorial.v1 rar file contains a web/html document so you will need to be connected to the internet to view the graphics with a web browser such as internet explorer 7. As they are hosted on photo bucket.(once you have extracted it to your pc right click and open)
The adding glass transparent effects contains a word document so you will need a programme that can open this kind of file
The adding glass transparent effects contains a word document so you will need a programme that can open this kind of file
If you have found this tutorial usefull and have had success, let me know in the thread. And please say thanks. 

-----
Tutorials:Object_Transparency_Tutorialwiki
Attached files:
| object transparency tutorial.v1.rar (3.7 KB, 2905 downloads) - View custom content | ||
                  Size   Packed Ratio  Date   Time     Attr      CRC   Meth Ver
-------------------------------------------------------------------------------
 object transparency tutorial.v1.htm
                 18279     3709  20% 13-02-07 18:29  .....A.   DB199CA5 m5b 2.9
-------------------------------------------------------------------------------
    1            18279     3709  20%
|
||
| adding glass transparent effects.rar (5.53 MB, 1292 downloads) - View custom content | ||
                  Size   Packed Ratio  Date   Time     Attr      CRC   Meth Ver
-------------------------------------------------------------------------------
 adding glass transparent effects.doc
               6345216  5794437  91% 15-02-06 15:04  .....A.   AA531B61 m5g 2.9
-------------------------------------------------------------------------------
    1          6345216  5794437  91%
|
||
| adding glass transparent effects-pdf.rar (2.59 MB, 1370 downloads) - View custom content | ||
                  Size   Packed Ratio  Date   Time     Attr      CRC   Meth Ver
-------------------------------------------------------------------------------
 adding glass transparent effects-pdf.pdf
              10455394  2718831  26% 14-02-07 11:17  .....A.   4FD60CC4 m5g 2.9
-------------------------------------------------------------------------------
    1         10455394  2718831  26%
|
||
Advertisement
#2
13th Feb 2007 at 7:45 PM
Last edited by mike19 : 22nd Feb 2007 at 1:03 PM.
13th Feb 2007 at 7:45 PM
Last edited by mike19 : 22nd Feb 2007 at 1:03 PM.
Posts: 509
Thanks: 3751 in 28 Posts
Here are some examples of what can be done using the method in the tutorial/s
#3
13th Feb 2007 at 7:54 PM
13th Feb 2007 at 7:54 PM
Posts: 4,502
Thanks: 13197 in 63 Posts
Yay, thank you for reposting the tutorial, it has been much needed  .
.
 .
.
#4
23rd Feb 2007 at 7:30 PM
23rd Feb 2007 at 7:30 PM
Posts: 141
Thanks: 5389 in 27 Posts
I have a problem
When I set stdMatAlphaBlendMode in Blend, all the object It's strange...
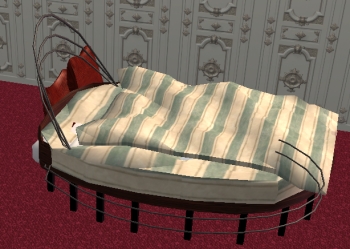
I want to make only the blanket transparent
Why?
When I set stdMatAlphaBlendMode in Blend, all the object It's strange...
I want to make only the blanket transparent
Why?
#5
23rd Feb 2007 at 8:30 PM
Last edited by mike19 : 23rd Feb 2007 at 9:33 PM.
23rd Feb 2007 at 8:30 PM
Last edited by mike19 : 23rd Feb 2007 at 9:33 PM.
Posts: 509
Thanks: 3751 in 28 Posts
where does that bed come from?
at the moment all i can say is it must be something you havent got right.
as i just checked in my screen shot. if you edit a beding texture from an original in game bed then the texture is applied to all beds includeing custom beds.
also i notice the colour in your screen shot is still there last time i got the dxt incorect it showed up on the game black not with the original colors.
have you recolored the texture correctly and did you get a checkerboard effect? i know it appears in paint shop pro but it may depend on what you used to edit the texture.
Please dont upload my creations to paysites.
But please feel free to use ANY other way you like
But please feel free to use ANY other way you like
You couldnt resist presing that button could you LOL
#6
24th Feb 2007 at 9:20 AM
24th Feb 2007 at 9:20 AM
Posts: 141
Thanks: 5389 in 27 Posts
I have changed the stdMatAlphaBlendMode in Blend to create a trasparent blanket.
I use gimp 2 for texturing. I Mapping the bed ( the blanket etc...), but I see semi-trasparent all object! ( the cuscions are behind the espalier et...)
I use gimp 2 for texturing. I Mapping the bed ( the blanket etc...), but I see semi-trasparent all object! ( the cuscions are behind the espalier et...)
#7
24th Feb 2007 at 9:27 AM
24th Feb 2007 at 9:27 AM
That happens with multi-subset objects. They dont support transperancy, except only when using the material definition (not a texture).
#8
24th Feb 2007 at 6:04 PM
Last edited by mike19 : 25th Feb 2007 at 1:03 AM.
24th Feb 2007 at 6:04 PM
Last edited by mike19 : 25th Feb 2007 at 1:03 AM.
Posts: 509
Thanks: 3751 in 28 Posts
i'm afraid it does look like you cant edit the texture in that object. the beds that i tested on have a seperate texture for the bedding. the bed and legs etc are in another seperate texture.
and as i did say at the top of this page:
;;;;;;;;;;;;;;;;;;;;;;;;;;;;;;
Some objects may be too complex for this method. If you do find problems you may have to clone the object and edit the alpha channel.
;;;;;;;;;;;;;;;;;;;;;;;;;;;;;;
but as this seems to be a new object your using and not a clone from a game version i dont know you will get any where with it.
Please dont upload my creations to paysites.
But please feel free to use ANY other way you like
But please feel free to use ANY other way you like
You couldnt resist presing that button could you LOL
#9
26th Feb 2007 at 8:19 AM
26th Feb 2007 at 8:19 AM
Posts: 141
Thanks: 5389 in 27 Posts
I create this bed by clone object. I would like create a trasparent blanket. Is not possible?
Maybe, us they must be a different part of object...as an example , the bed i'ts composite of two part of objectm frame and bedding, but it's usable only frame, because bedding it's s part of animation.
Excuse me, but I don't speak very well english
Maybe, us they must be a different part of object...as an example , the bed i'ts composite of two part of objectm frame and bedding, but it's usable only frame, because bedding it's s part of animation.
Excuse me, but I don't speak very well english
#10
26th Feb 2007 at 11:00 AM
26th Feb 2007 at 11:00 AM
Posts: 509
Thanks: 3751 in 28 Posts
you normally need at least two seperate textures, 1 for the bed and another for the bed sheets, from the the texture you have shown it looks like it only has one texture for the bed and bed sheets.
have a look at the screenshots of the test bed i made it shows the texture for the bed and a texture for the beding.
if you do only have one texture perhaps you need to change it so it will have two so it will only be the bed sheets you edit.
have a look at the screenshots of the test bed i made it shows the texture for the bed and a texture for the beding.
if you do only have one texture perhaps you need to change it so it will have two so it will only be the bed sheets you edit.
Please dont upload my creations to paysites.
But please feel free to use ANY other way you like
But please feel free to use ANY other way you like
You couldnt resist presing that button could you LOL
#11
26th Feb 2007 at 12:01 PM
Last edited by kihaad : 26th Feb 2007 at 12:09 PM.
26th Feb 2007 at 12:01 PM
Last edited by kihaad : 26th Feb 2007 at 12:09 PM.
Posts: 141
Thanks: 5389 in 27 Posts
I have tried to make therefore: There are two part of an object, in one I use ONLY texture without trasparent , in two I modify the material definion in Blend, for trasparent.
But I have however the problem that I have made to see.
I see many site that they succeeded to make it.
In the example of the bed , I cannot make what you have said , because the the blanket is part of the first group of objects.
I have read that it must modify the alpha channel, there is a tutorial?
#12
26th Feb 2007 at 10:20 PM
Last edited by mike19 : 28th Feb 2007 at 12:20 PM.
26th Feb 2007 at 10:20 PM
Last edited by mike19 : 28th Feb 2007 at 12:20 PM.
Posts: 509
Thanks: 3751 in 28 Posts
uhm
if you like i'll take a closer look at the file/s
then we may get past what neither of us understand, be it down to language or the tutorial.
send me the file in a rar or WinZIP if you like pm me for my email address with
or if you have seen success in other objects have a look at them with SimPE and see what was done.
if it's any consulation before i worked out this tutorials technique i originally took 3 weeks to make my first transparent/see through object as there was no tutorial or advice available and thats what prompted me to write what i know. there is claimed to be other way's but mine is what i can deal with it's not fool proof and i am happy to help as much possible.
have a look at this link it's one of my first attempts at this idea
http://www.modthesims2.com/showthread.php?t=67747
it's awfull by comparison now, but i made it and it still gets downloads now and then.
Please dont upload my creations to paysites.
But please feel free to use ANY other way you like
But please feel free to use ANY other way you like
You couldnt resist presing that button could you LOL
#13
14th Mar 2007 at 7:32 PM
14th Mar 2007 at 7:32 PM
Posts: 8

I started doing your transparency tutorial last night but still can't get to the recoloring stage. I do not get the Generic RCOL Editor up in the Plug In window like you show so I can't select "Blend". I've checked all over the SimPE site and even downloaded and printed out manuals and tutorials for SimPE but nowhere do I see how to get this RCOL editor. I've even reinstalled SimPE but still don't see it.
#14
16th Mar 2007 at 12:42 PM
16th Mar 2007 at 12:42 PM
Posts: 509
Thanks: 3751 in 28 Posts
with your file open in simpe, up on top left under resource tree, . make sure you highlight material definition. then on the right under resource list highlight the txmt .you should see something like:
beddoublecolonial-[mike190870-23.2.2007-142f23]_frame_rosewood_txmt
then at the bottom you should see the stdMatAlphaBlendMode properties in the list in plugin view.make sure you have selected the content & properties tab
if you still cant see it then you may need to post for help in another thread with SimPE
Please dont upload my creations to paysites.
But please feel free to use ANY other way you like
But please feel free to use ANY other way you like
You couldnt resist presing that button could you LOL
#15
27th Mar 2007 at 4:53 PM
27th Mar 2007 at 4:53 PM
Posts: 236
Thanks: 4281 in 14 Posts
I got a question:
What do I have to do in my graphic editor to get the checkerboard effect?
What do I have to do in my graphic editor to get the checkerboard effect?
#16
28th Mar 2007 at 1:09 AM
Last edited by mike19 : 28th Mar 2007 at 10:58 AM.
28th Mar 2007 at 1:09 AM
Last edited by mike19 : 28th Mar 2007 at 10:58 AM.
Posts: 509
Thanks: 3751 in 28 Posts
Quote: Originally posted by RealGanacampo
|
I got a question: What do I have to do in my graphic editor to get the checkerboard effect? |
depends on what programme your using
also make sure you have followed step.......
9 & then 10.
Underneath in plugin view change the value from none to blend
(just type blend in to the value box) click commit & save the file. Then repeat for the other material definition ............
and through to step 12
if you are using paintshop pro you will see the checkerboard effect if you are using another programme then as long as you have followed the tutorial then you should have no problem. regardless of the programme you use. any programme that can handle the png format and transparency will be ok.
Please dont upload my creations to paysites.
But please feel free to use ANY other way you like
But please feel free to use ANY other way you like
You couldnt resist presing that button could you LOL
#17
14th Jul 2007 at 8:15 PM
14th Jul 2007 at 8:15 PM
Posts: 20

#18
16th Jul 2007 at 11:33 AM
16th Jul 2007 at 11:33 AM
Posts: 509
Thanks: 3751 in 28 Posts
i'm not sure what you mean. I can't see a problem. Or maybe i need new galssses. Without spending the next hour experimenting and trying to duplicate what you have done i cant give an answer with the info so far.
Please dont upload my creations to paysites.
But please feel free to use ANY other way you like
But please feel free to use ANY other way you like
You couldnt resist presing that button could you LOL
#19
16th Jul 2007 at 3:33 PM
16th Jul 2007 at 3:33 PM
Thanks for the tutorial. I might use this a lot.
Test Subject

#21
16th Jul 2007 at 4:52 PM
16th Jul 2007 at 4:52 PM
Posts: 4,403
Thanks: 10660 in 115 Posts
Crissie0721,
curtains like windows can be placed from both sides of the wall, may ensure they're placed from the same side.
Turenz93,
may read this tutorial
http://www.modthesims2.com/member/s...ead.php?t=31995
curtains like windows can be placed from both sides of the wall, may ensure they're placed from the same side.
Turenz93,
may read this tutorial
http://www.modthesims2.com/member/s...ead.php?t=31995
#22
17th Jul 2007 at 9:53 PM
17th Jul 2007 at 9:53 PM
Posts: 20
mike19:
I've tried again with the same results. Maybe this picture will display my problem a little better. I used the Floor Length Tie back curtains knowing that the texture is lended to the Sill Length and Doublewide as well. The floor length and sill length turn out just fine, but the doublewide looks like the swag portion is behind the sheers instead of in front. Any ideas why?
niol:
thanks but they are all on the inside ....
#23
17th Jul 2007 at 11:06 PM
17th Jul 2007 at 11:06 PM
Posts: 509
Thanks: 3751 in 28 Posts
well i have no idea, apart from maybe it's the way the texture was originally mapped. But i have a suggestion...
that is to leave the sheers as a solid colour
that is to leave the sheers as a solid colour
Please dont upload my creations to paysites.
But please feel free to use ANY other way you like
But please feel free to use ANY other way you like
You couldnt resist presing that button could you LOL
#24
18th Jul 2007 at 4:23 AM
18th Jul 2007 at 4:23 AM
Posts: 4,403
Thanks: 10660 in 115 Posts
The upper piece of the 2-tiled curtain is meshed differently from the 1-tiled one.
I also think mike's suggestion is a neat one.
As for some unmapped region of a mesh, one may try the StdMatCullMode none.
http://www.sims2wiki.info/TXMT/Para.../StdMatCullMode
Either add or edit the line "StdMatCullMode" to be "none" @ the txmt file.
This can be tried on this instance to see if anything happens, too. I'm unsure tho.
#25
18th Jul 2007 at 4:25 AM
18th Jul 2007 at 4:25 AM
Mike, that sort of defeats the idea of making sheers, yes?
There is a problem in general with using the 'blend' setting, which is that pieces that overlap each other with blend sometimes will display as these curtains are - something about the order of how the pieces were made will change how they display in game.
Unless you made the curtains mesh and thus can remake it Crissie, I think those curtains will have to not use blend.
But if you want to *shorten* them (or put holes in them), you can do that by setting
stdMatAlphaBlendMode:none
stdMatAlphaTestEnabled:1
and then keep everything solid and erase the parts you don't want to show (if it's a png) That setting will work with objects where blend makes a mess.
"Undertake something that is difficult; it will do you good. Unless you try to do something beyond what you have already mastered, you will never grow." - Ronald E. Osborn
Please do NOT PM me with requests, creation questions, or game help questions. Click for help:
Game Help | Create | Content List | Where Can I Find?
Game Help | Create | Content List | Where Can I Find?
Who Posted
|
|