I was asked how I made the cover over the swimming pool in the Montague house I recently built
http://modthesims.info/d/442592.
I tried replying but realized it would take time to explain it an so I decided it would be best described through this little tutorial since there might be others who would be interested.
This tutorial is thus for beginners to lot building that are interested in creating or placing a cover over their pool and it can also be useful to others as well. I take it from the beginning to the end based on the method I used. It can also be useful to others who might be interested though used to raising curved surfaces. The only tool required is your installed game and the zeal that comes from learning.
STAGE ONE
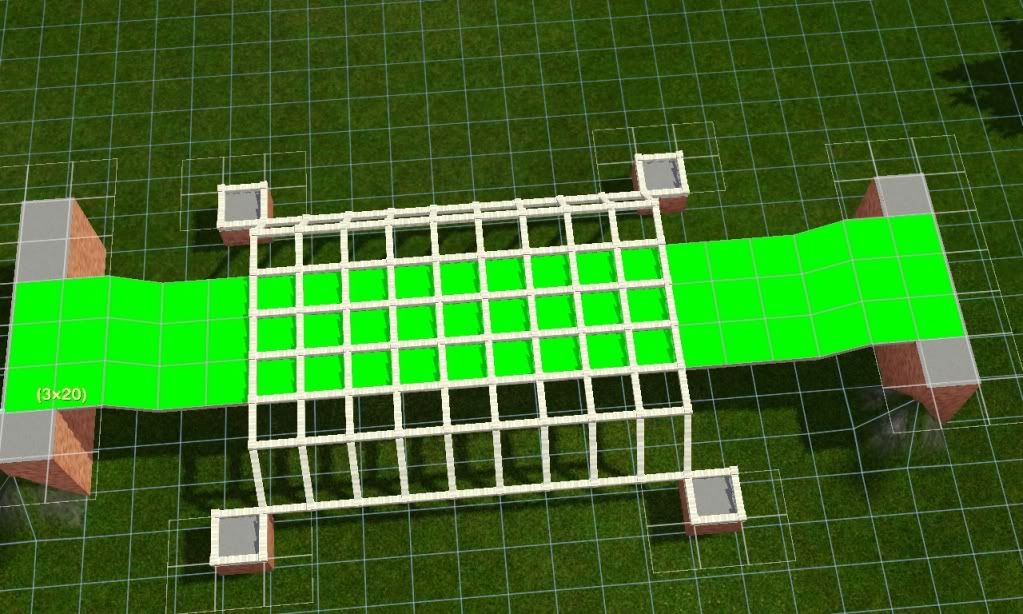
You need to have an idea of the pool you want to make and how many tile space you want the pool to cover. For this tutorial I will assume a 7x9 tile space
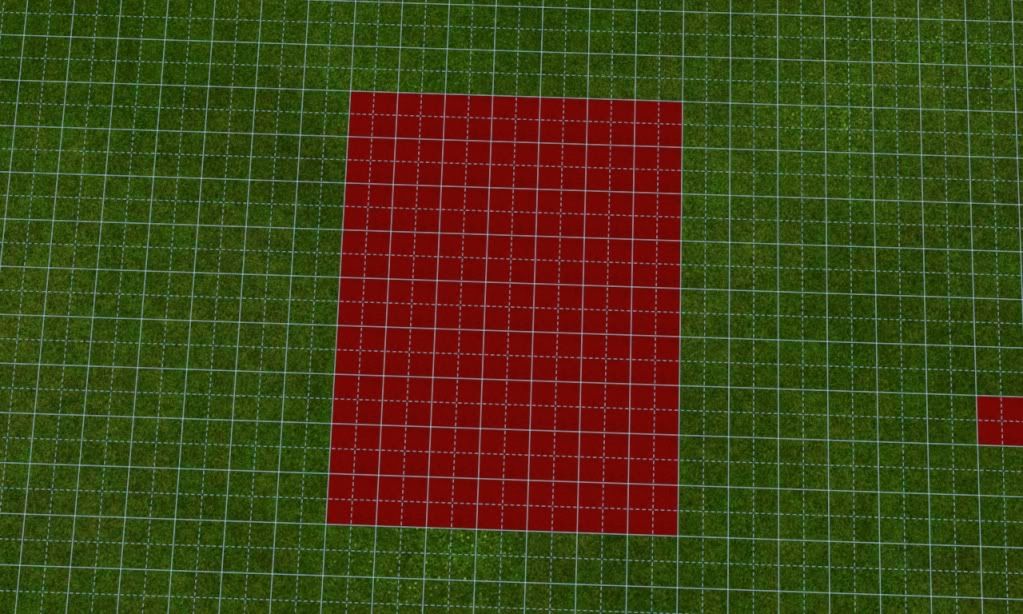
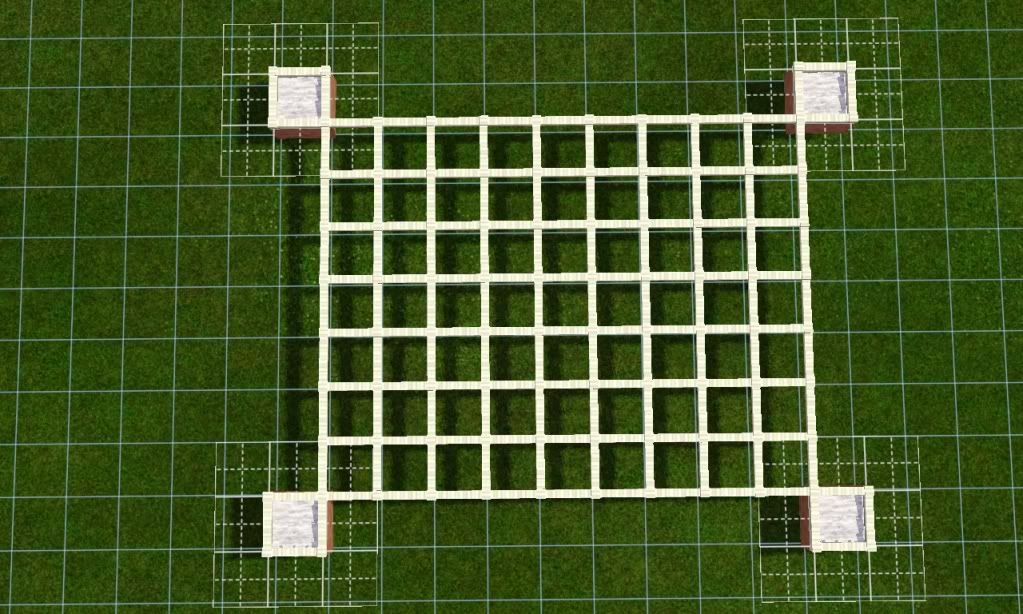
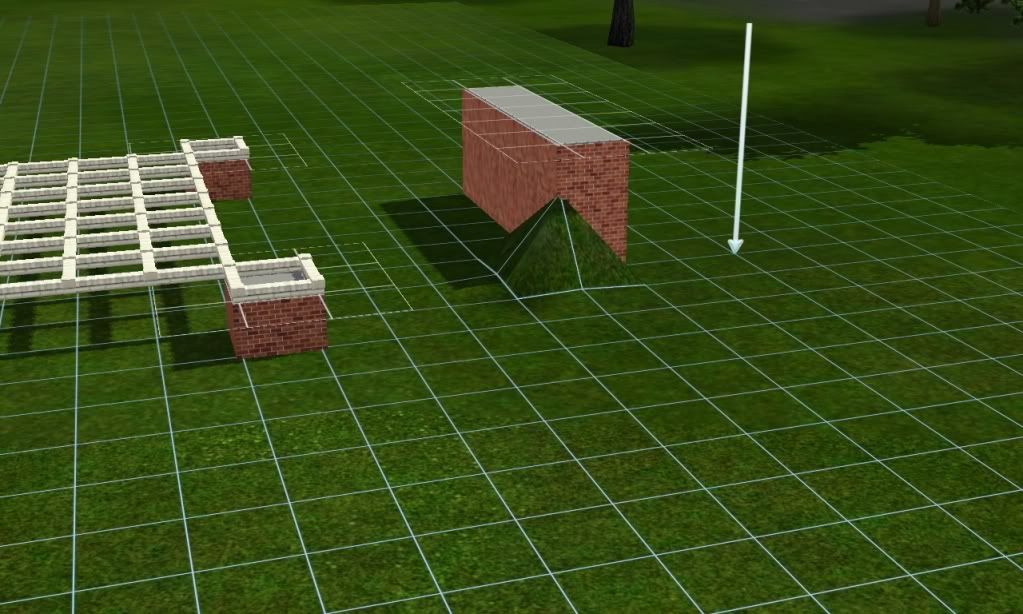
Having determined your tile space, and still leaving the tiles, use the foundation tool to place a 1x1 square foundation at the four end corners of your tile space.
Then using the foundation tool again place a foundation to cover the tile space. This will allow you make your cover design over the pool
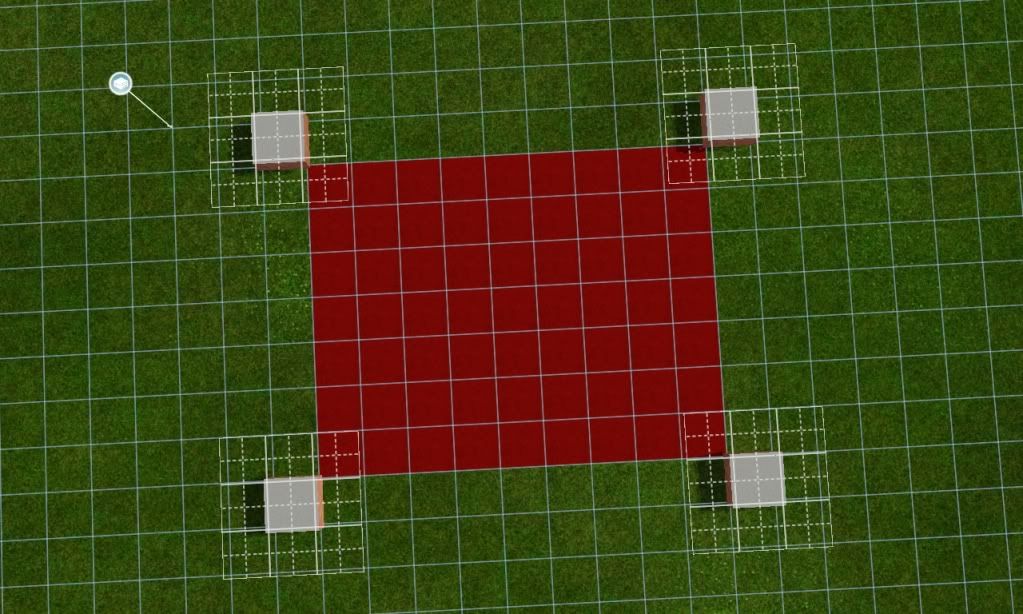
When the foundation is in place click the fences tool and pick any of
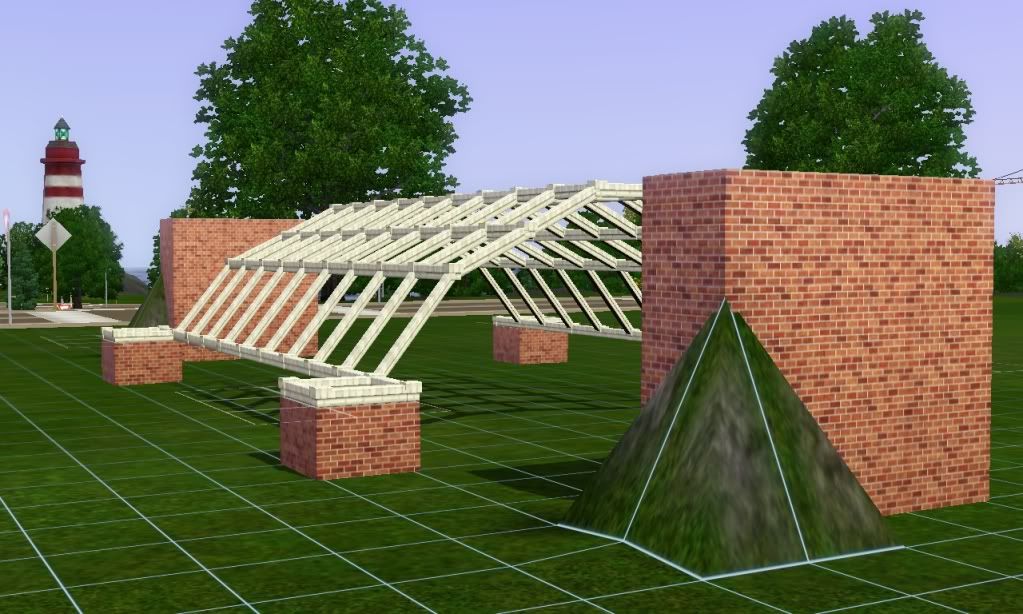
stream of consciousness wall and design the cover that you want to have over the pool (I would suggest you follow my example and when you feel you are better you can experiment with other designs). Below is my design for the pool cover.
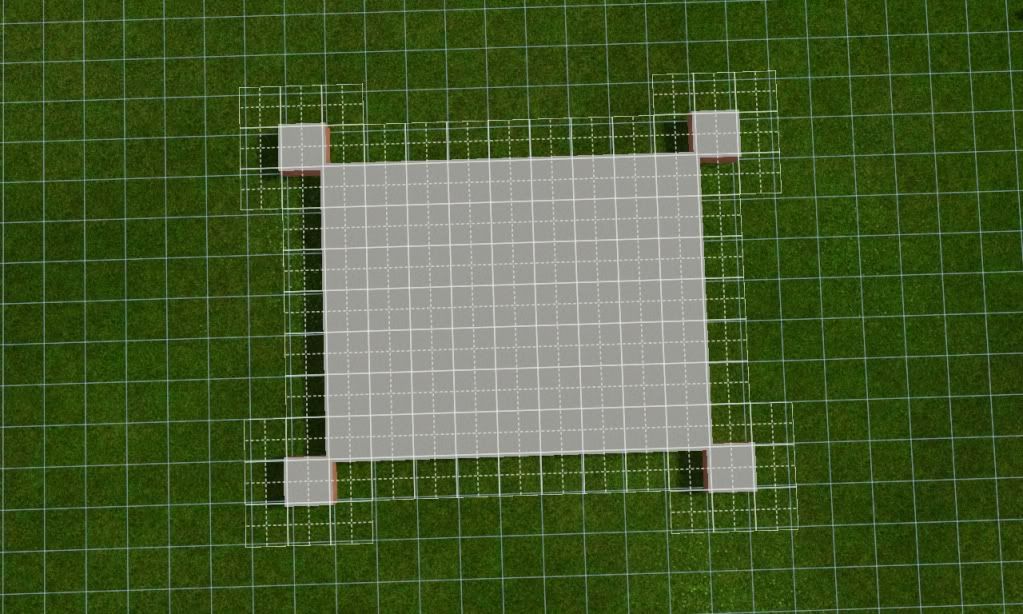
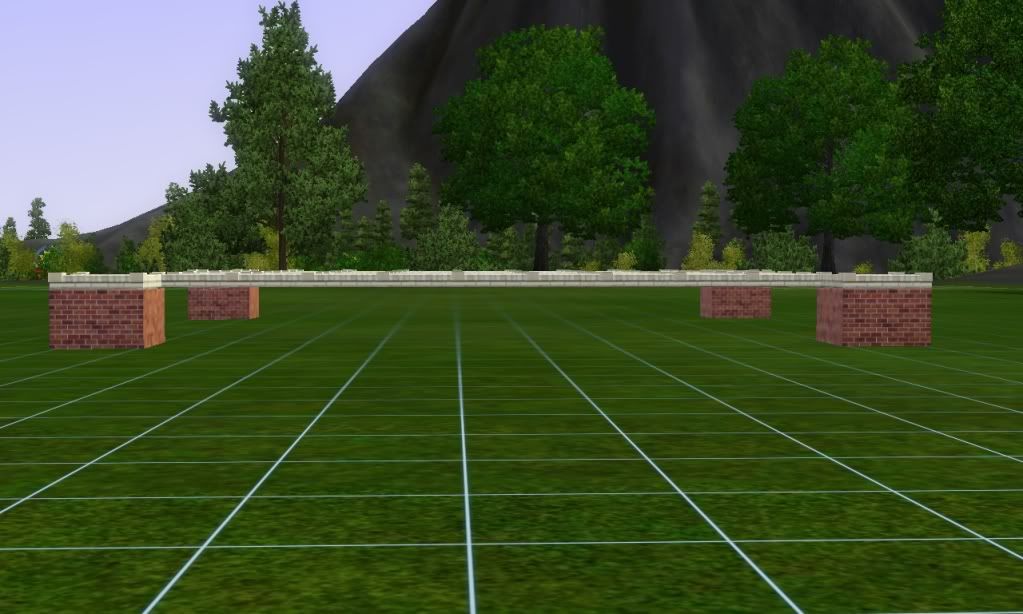
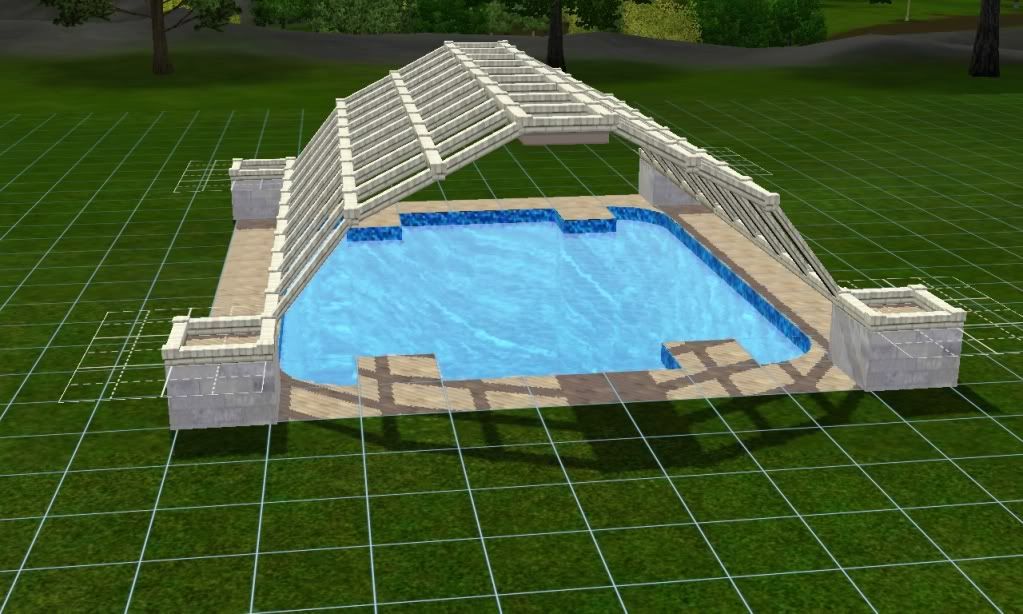
When you have finished, use the delete hammer tool and place it at one end of the foundation covering the tile and drag to the other diagonal end and release it to delete the foundation. Do the same by deleting the tiles now and you should have something similar to this from top and ground level
 STAGE TWO
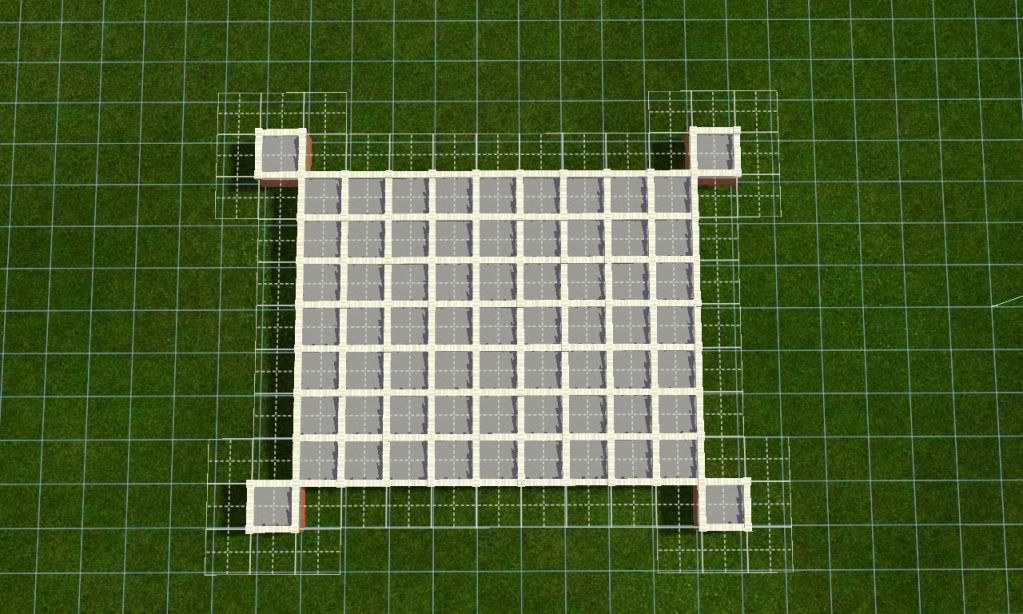
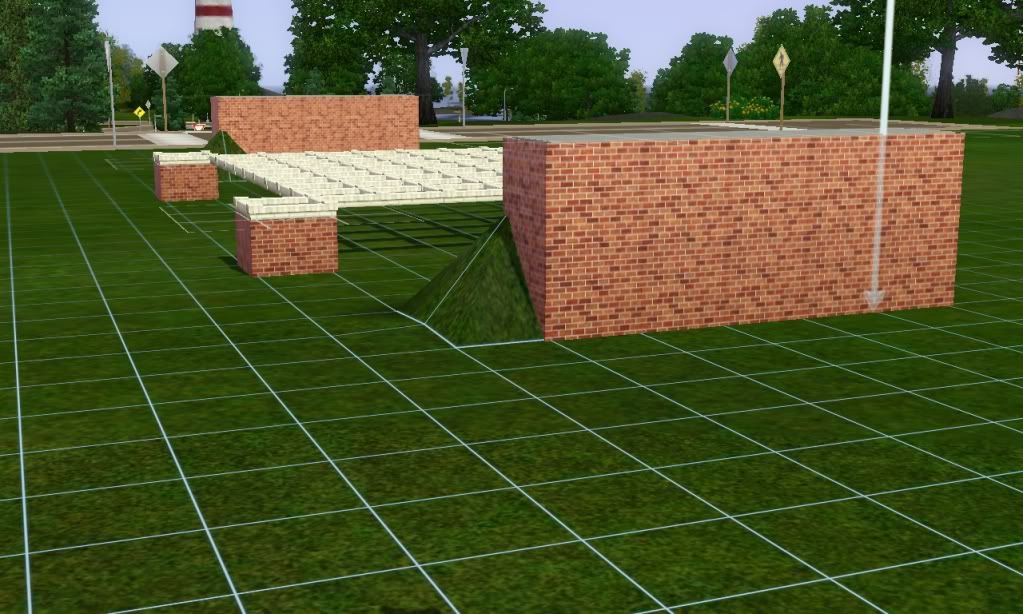
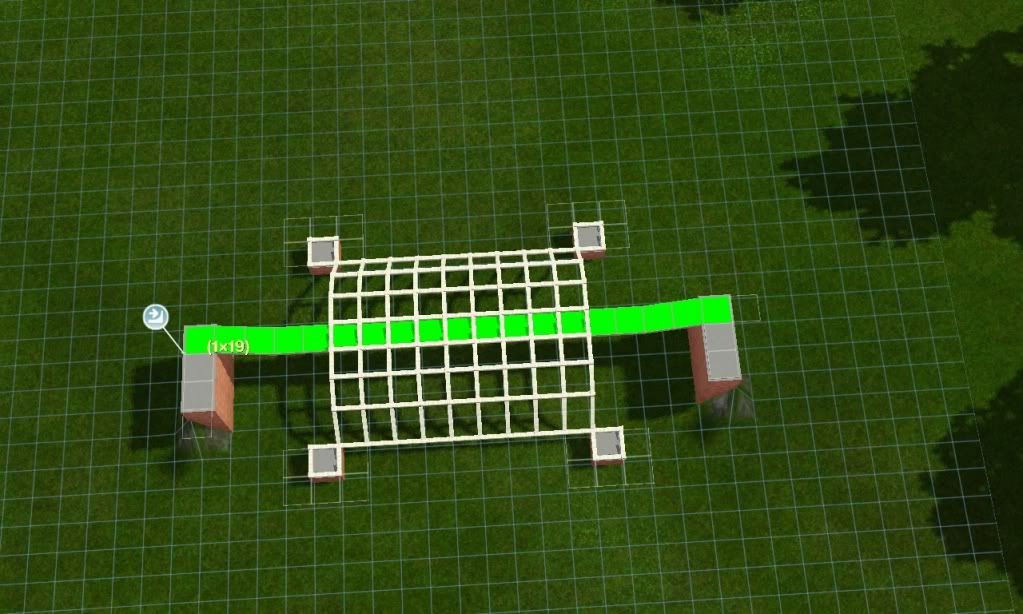
Once the above is done then you are ready for the next step. What we want is to raise the designed pool cover to sit over the pool once finished. Now we can do this from any side of the pool but I prefer to start on the width wise rather than the length side. From the width wise, I have 7 rows of tile space and I want to make the centre row (4th from each side) the middle of the pool cover which is a wall high).
So click on the terrain tool and set the brush sharpness to very soft by moving the slide all the way to the right and choose the small circular brush at the extreme left of the brush shape. This helps to make sure that you do not miss your click. (Here its important you know the clicks you want for each of your level for the pool cover. I will be using 5clicks for the first level, 7clicks (5+2) for the next level and then 8clicks (7+1) for the centre level.
So with your terrain raise tool set at one end of the width side about 4 squares from the pool foundation
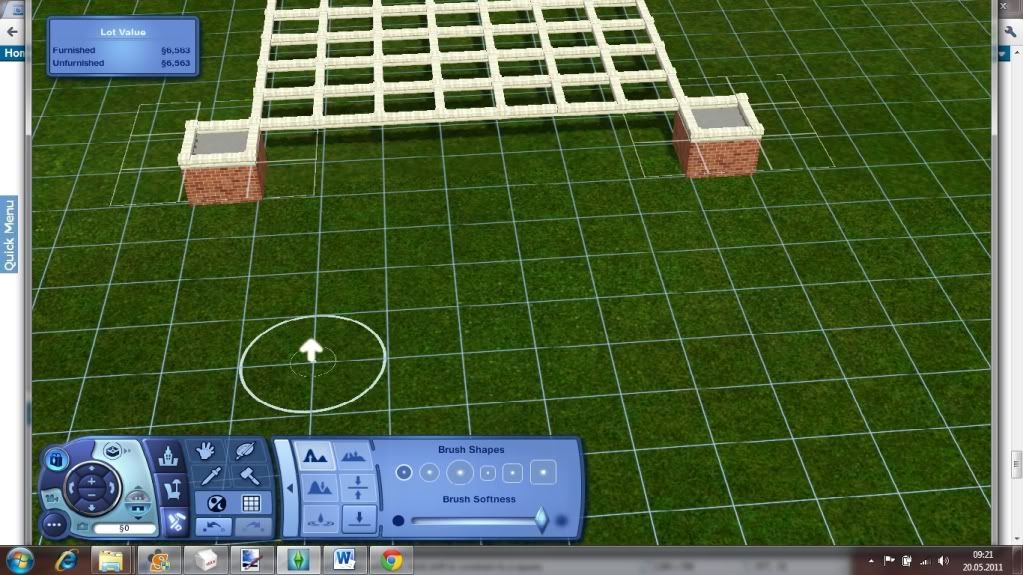
Raise the floor by 5 clicks
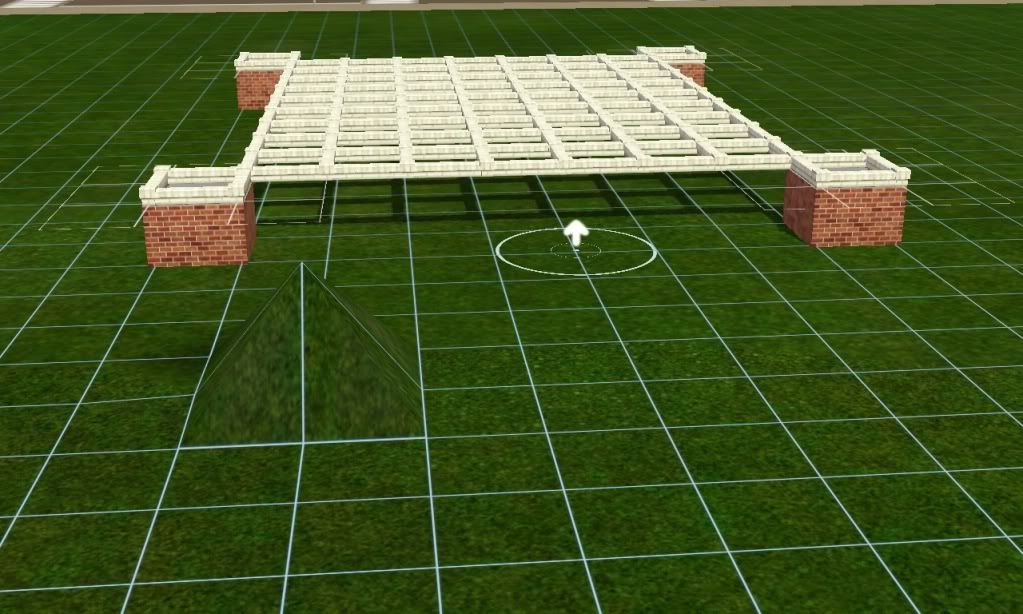
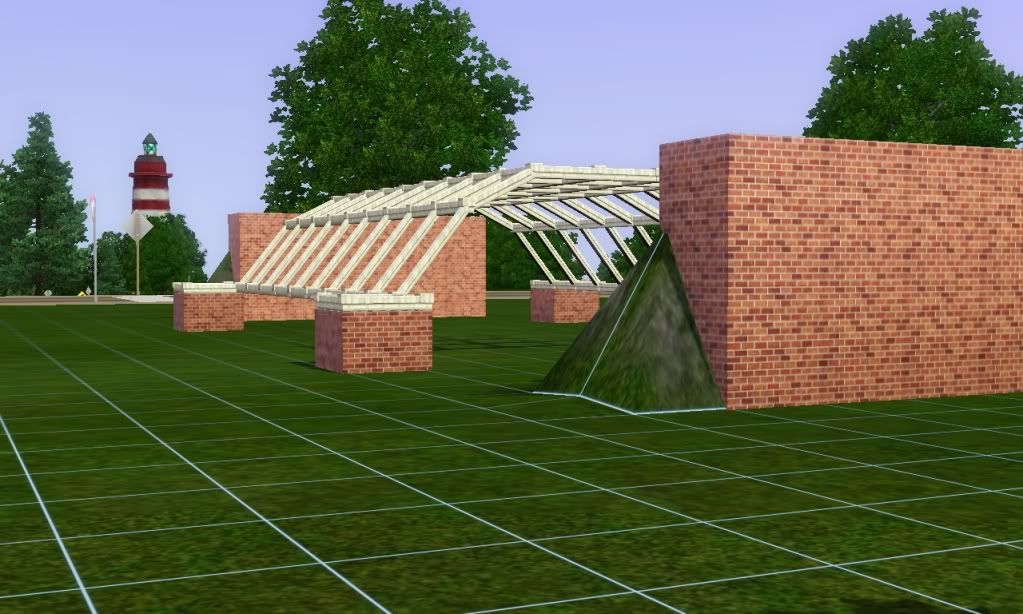
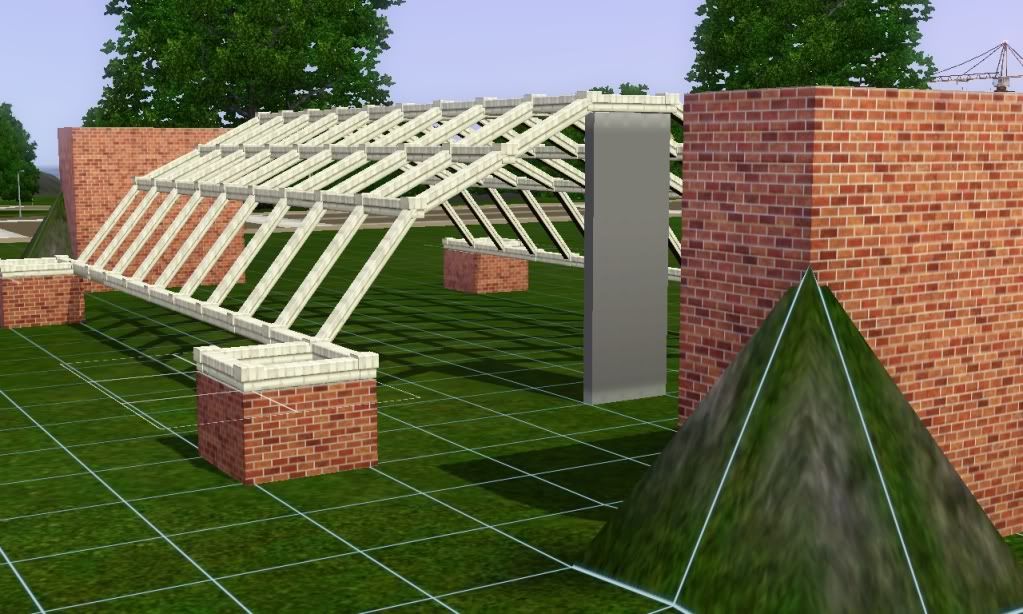
Then using the basement tool drag from the top of the raised floor to the other side of the raised floor to have this
Then go to the other side of the width and do the same and you will have something similar to this
 THIRD STEP
Now would be the best time to save your work so that if something goes wrong you can reload the saved file. Once you are ready, then comes the CFE command. Now press
cont+chift+c to bring up the command console and enter
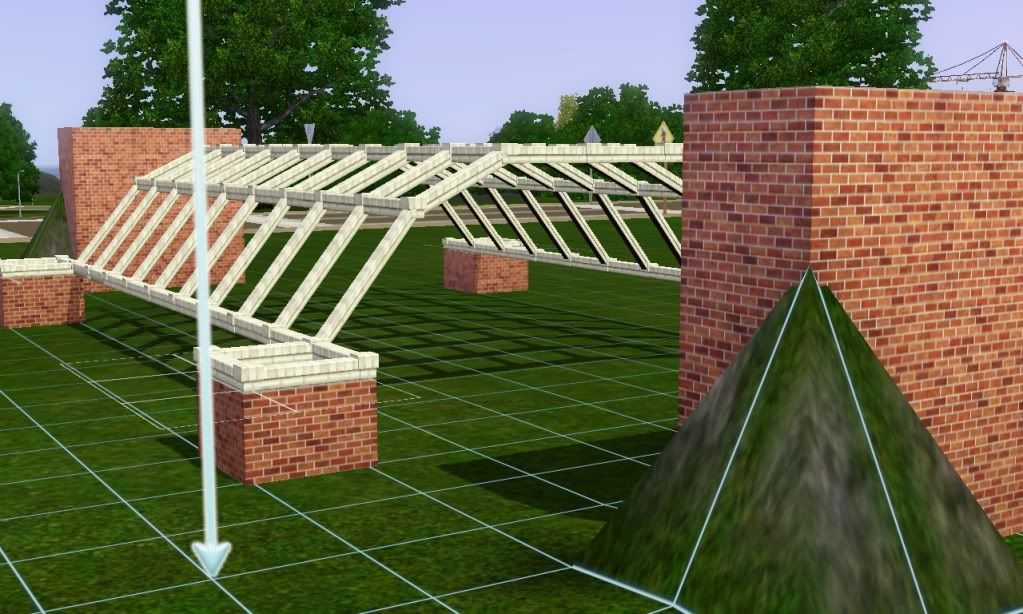
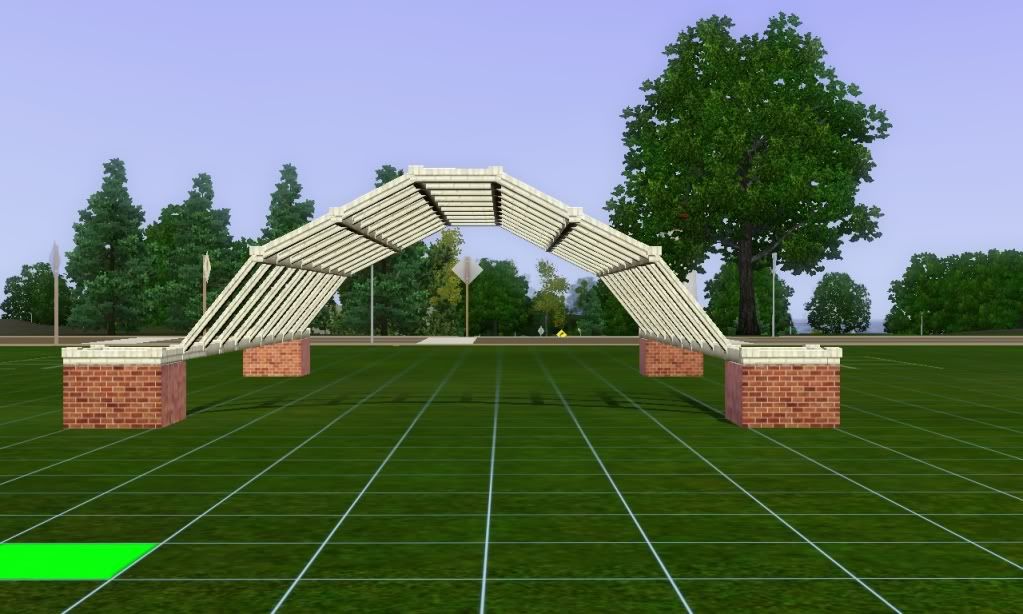
constrainfloorelevation false and press enter to turn the command on. Go to he top view camera position, and clicking the terrain tool choose the level tool and place it at one end of the raised foundation and drag it to the opposite side raised foundation to cover the inner tiles leaving out the outer most two lines as shown below.

Releasing your mouse will raise the designed cover and from ground view will look like this
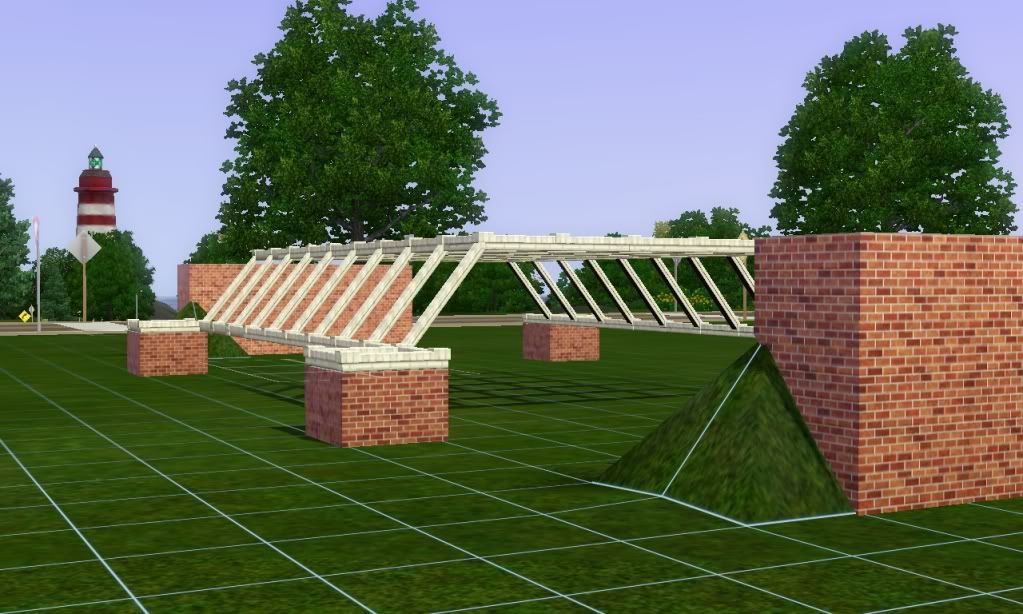
You can delete the foundation at the two opposite sides but do not touch the raised floor. With you terrain tool set as before raise the floor egain by a further 2 clicks at both ends. And then using the foundation tool again put the foundation in place to have the same as shown below. As you can see the foundations are higher than the pool cover.
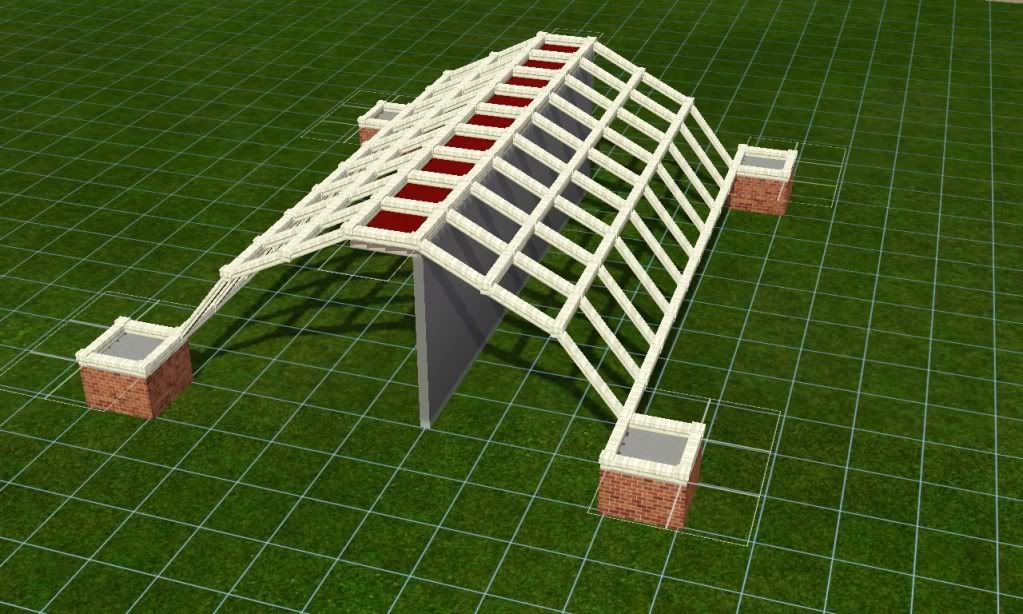
Now go back to the top down camera view again and clicking the level terrain tool again slide it like we did before from one end to the other side but this time we make an adjustment.We need to take the middle tiles leaving the next extreme tiles from the previous raised floor. See picture below for what I mean. As you can see I now have two block rows left at both ends, this is to give it a raised look and that curve that is desired.
Then go down to make sure you have something similar to this.
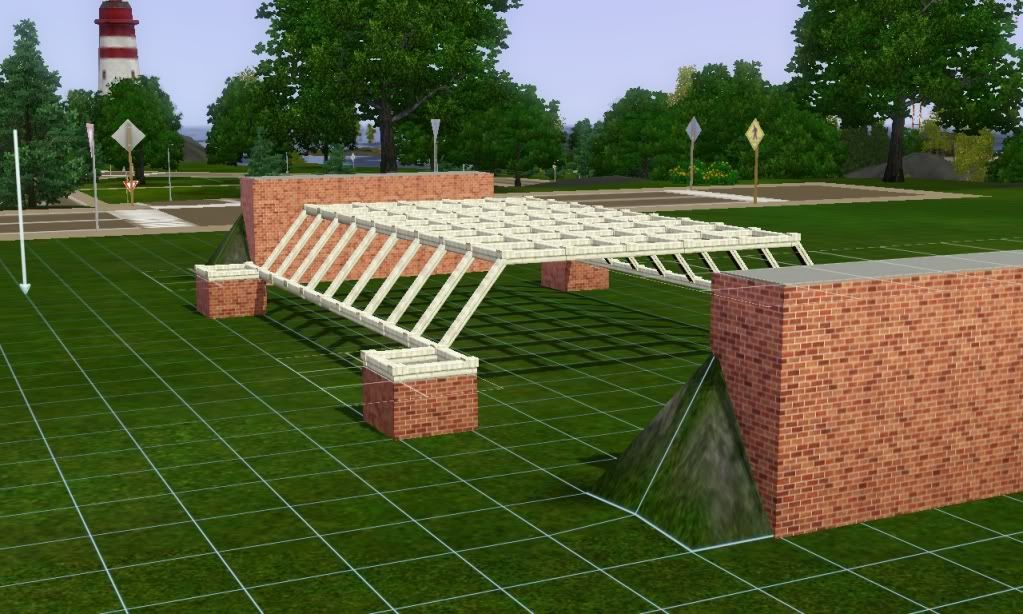
Again delete the foundation, and raise the elevated floor with your next click (for this tutorial just 1 click.) and then put back the foundation again at both ends as we did previously to have this
and once again go back to the top view position and do the same with the level terrain tool but again leave the next outer row of tile and pick the middle one as shown below in the picture.
Go back to your level camera to see the out come.
If you drag a wall at the middle raised wall, it should fit in.
Now you can turn the cheats off by pressing ctr +shif+c at the same time and using
constrainfloorelevation true in the command line as done ealier. Then delete the two foundations and level the floor. This is what I have after this
.
FINAL PART
If you want to place a light over the pool then drag a wall over the middle cover then place some tiles above it and then delete the wall.
If you do not need light then forget this part.
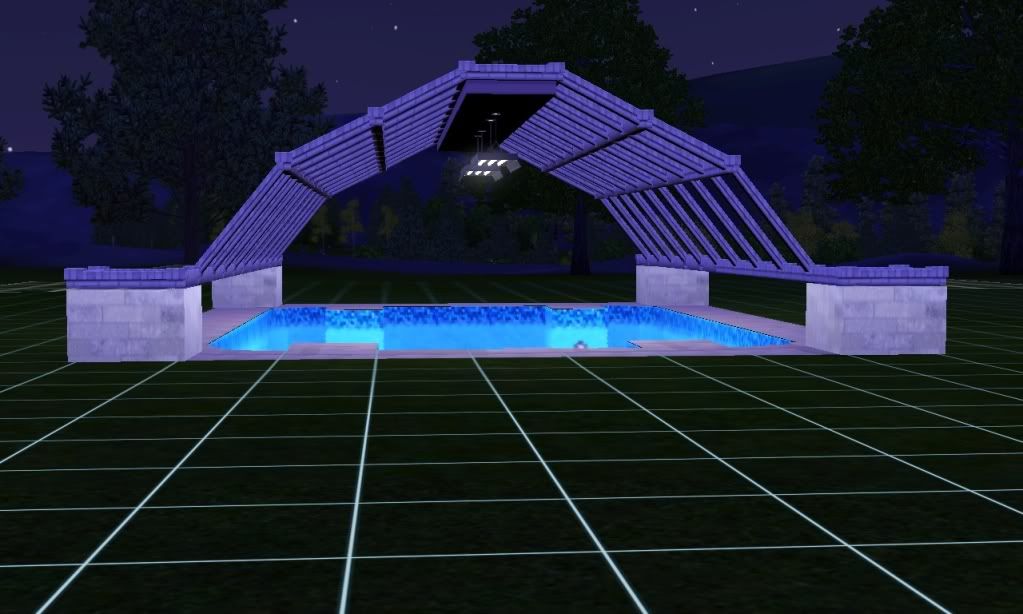
With this done, press the go down a floor arrow to take off the pool cover off the view, then design your pool the way you like. This is mine for the tutorial and a ground level in the night
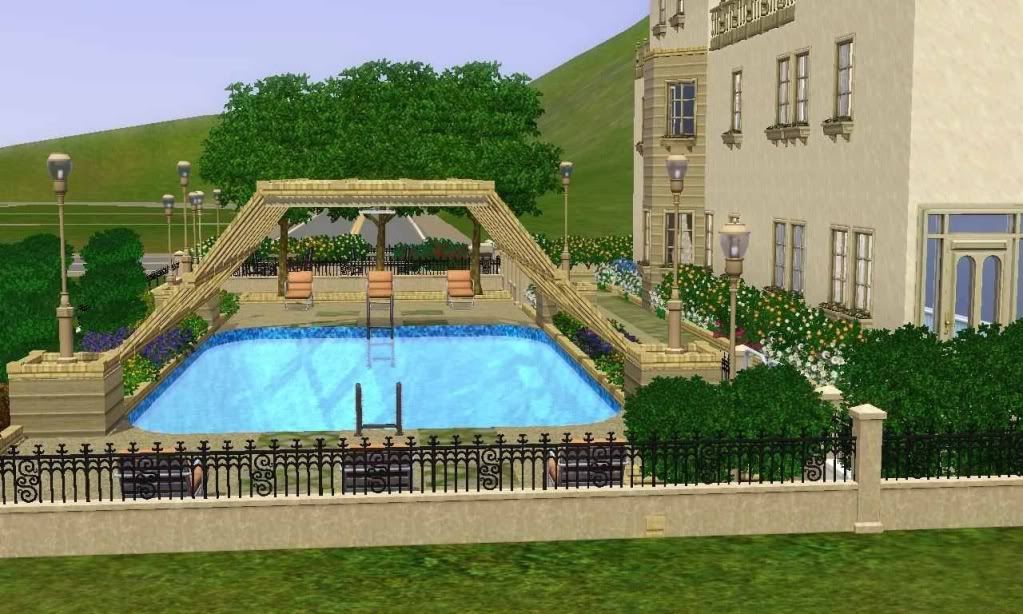
Remember this is just a guide and it becomes vey interesting when you think outside the box on what you want and then bring the creativity into life. You can desige it the way you want and the top mus not be curved like in this tutorial if you do not want it. For my house earlier mentioned the pool had a flat top. Here it is
.
CREDIT
My special thanks to armiel at MTS for his wonderful world Finnington which I used for this tutorial and tcitalianguy for asking me the question. And the special people from MTS from whom I have learnt so much from. Thank you all and have a wonderful Simming.
 Sign in to Mod The Sims


